BLOG POST
Managing client relationships is challenging enough without manually tracking who needs a review request. If you're using MyCase for your law practice management and want to automate your review collection process, integrating with TrueReview through Zapier can save you hours of manual work each week. Evaluating Clio alongside MyCase? Read our full Clio review before you decide.
In this guide, we'll walk you through setting up an automated workflow that sends review requests to your clients the moment you're ready—no more copying and pasting client information or forgetting to follow up.
Before we dive into the setup, let's talk about why this matters. Client reviews are essential local SEO for lawyers, but timing is everything. You want to request feedback when the experience is fresh, but you also need to choose the right moment in your client relationship. Manual processes often mean reviews slip through the cracks during busy periods.
This integration solves that problem by letting you trigger review requests with a simple custom field update in MyCase. When you're ready to request a review, just add a trigger phrase to the client's profile, and the automation handles everything else.
Before setting up the integration to automate review requests, we first need to define a trigger that will initiate the request.
For this guide, we’ll create a Custom Field for Contacts and use it as the trigger for sending review requests. You can choose other ways to trigger the request.
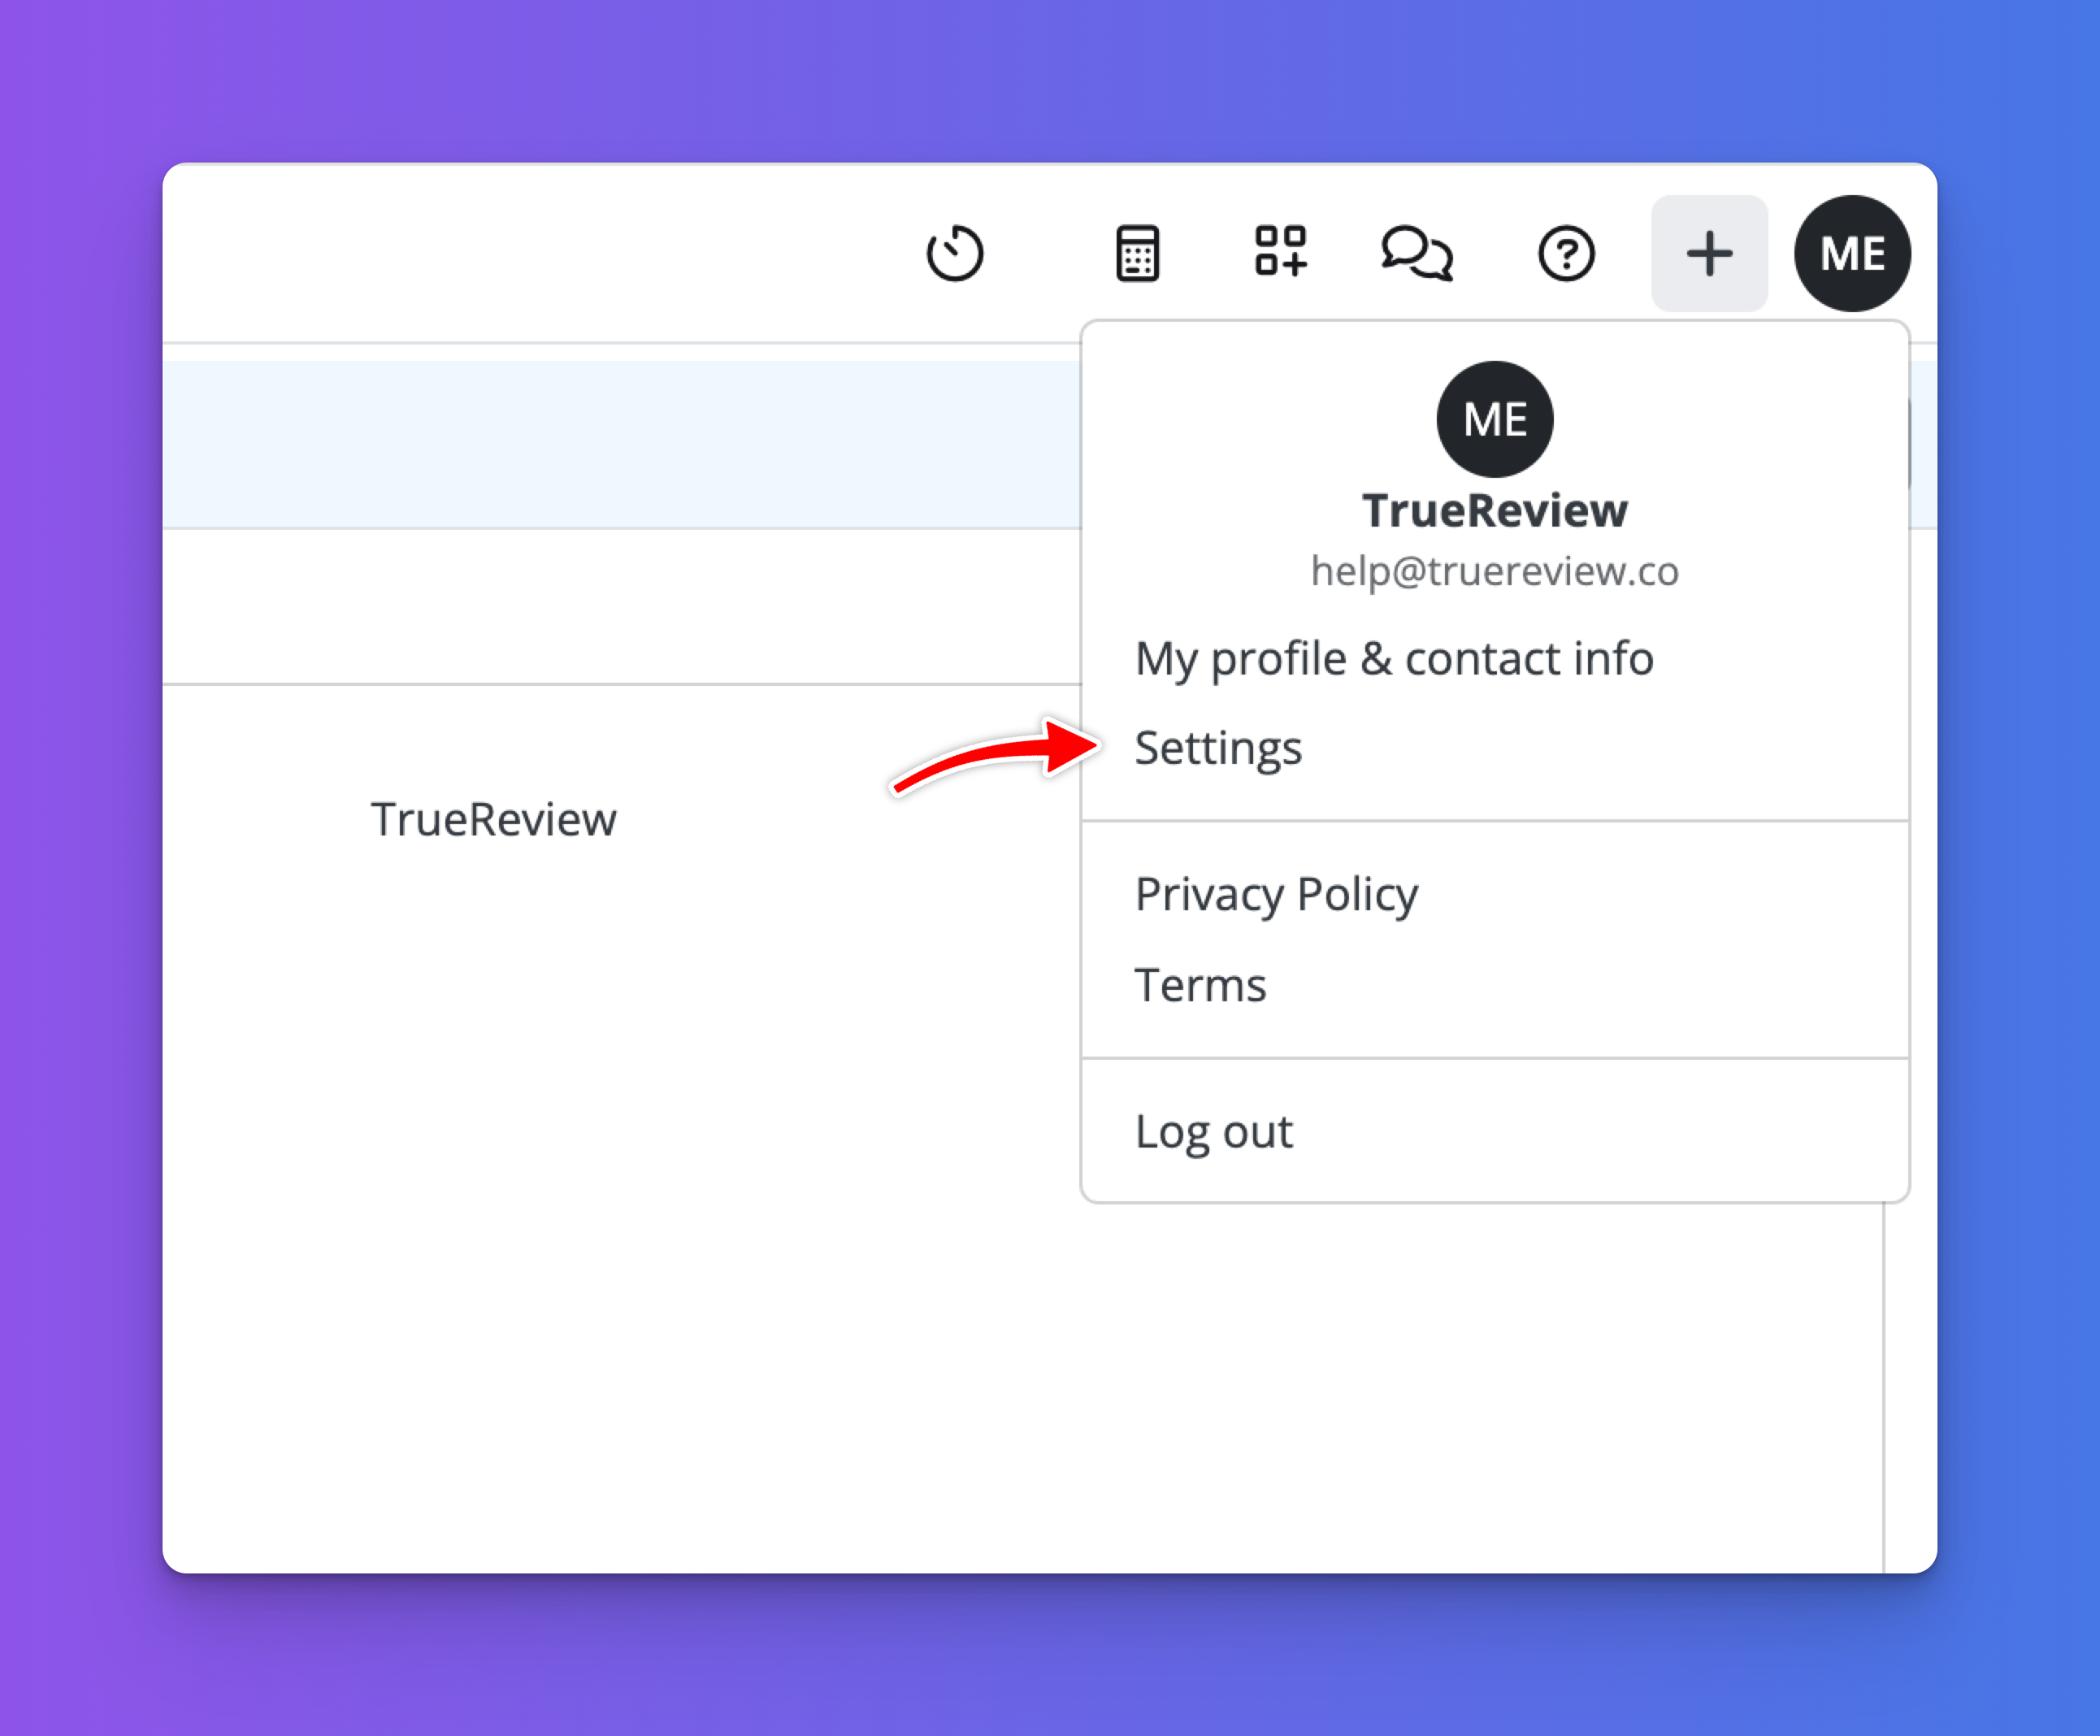
In MyCase, click the dropdown menu in the top right corner and select Settings.
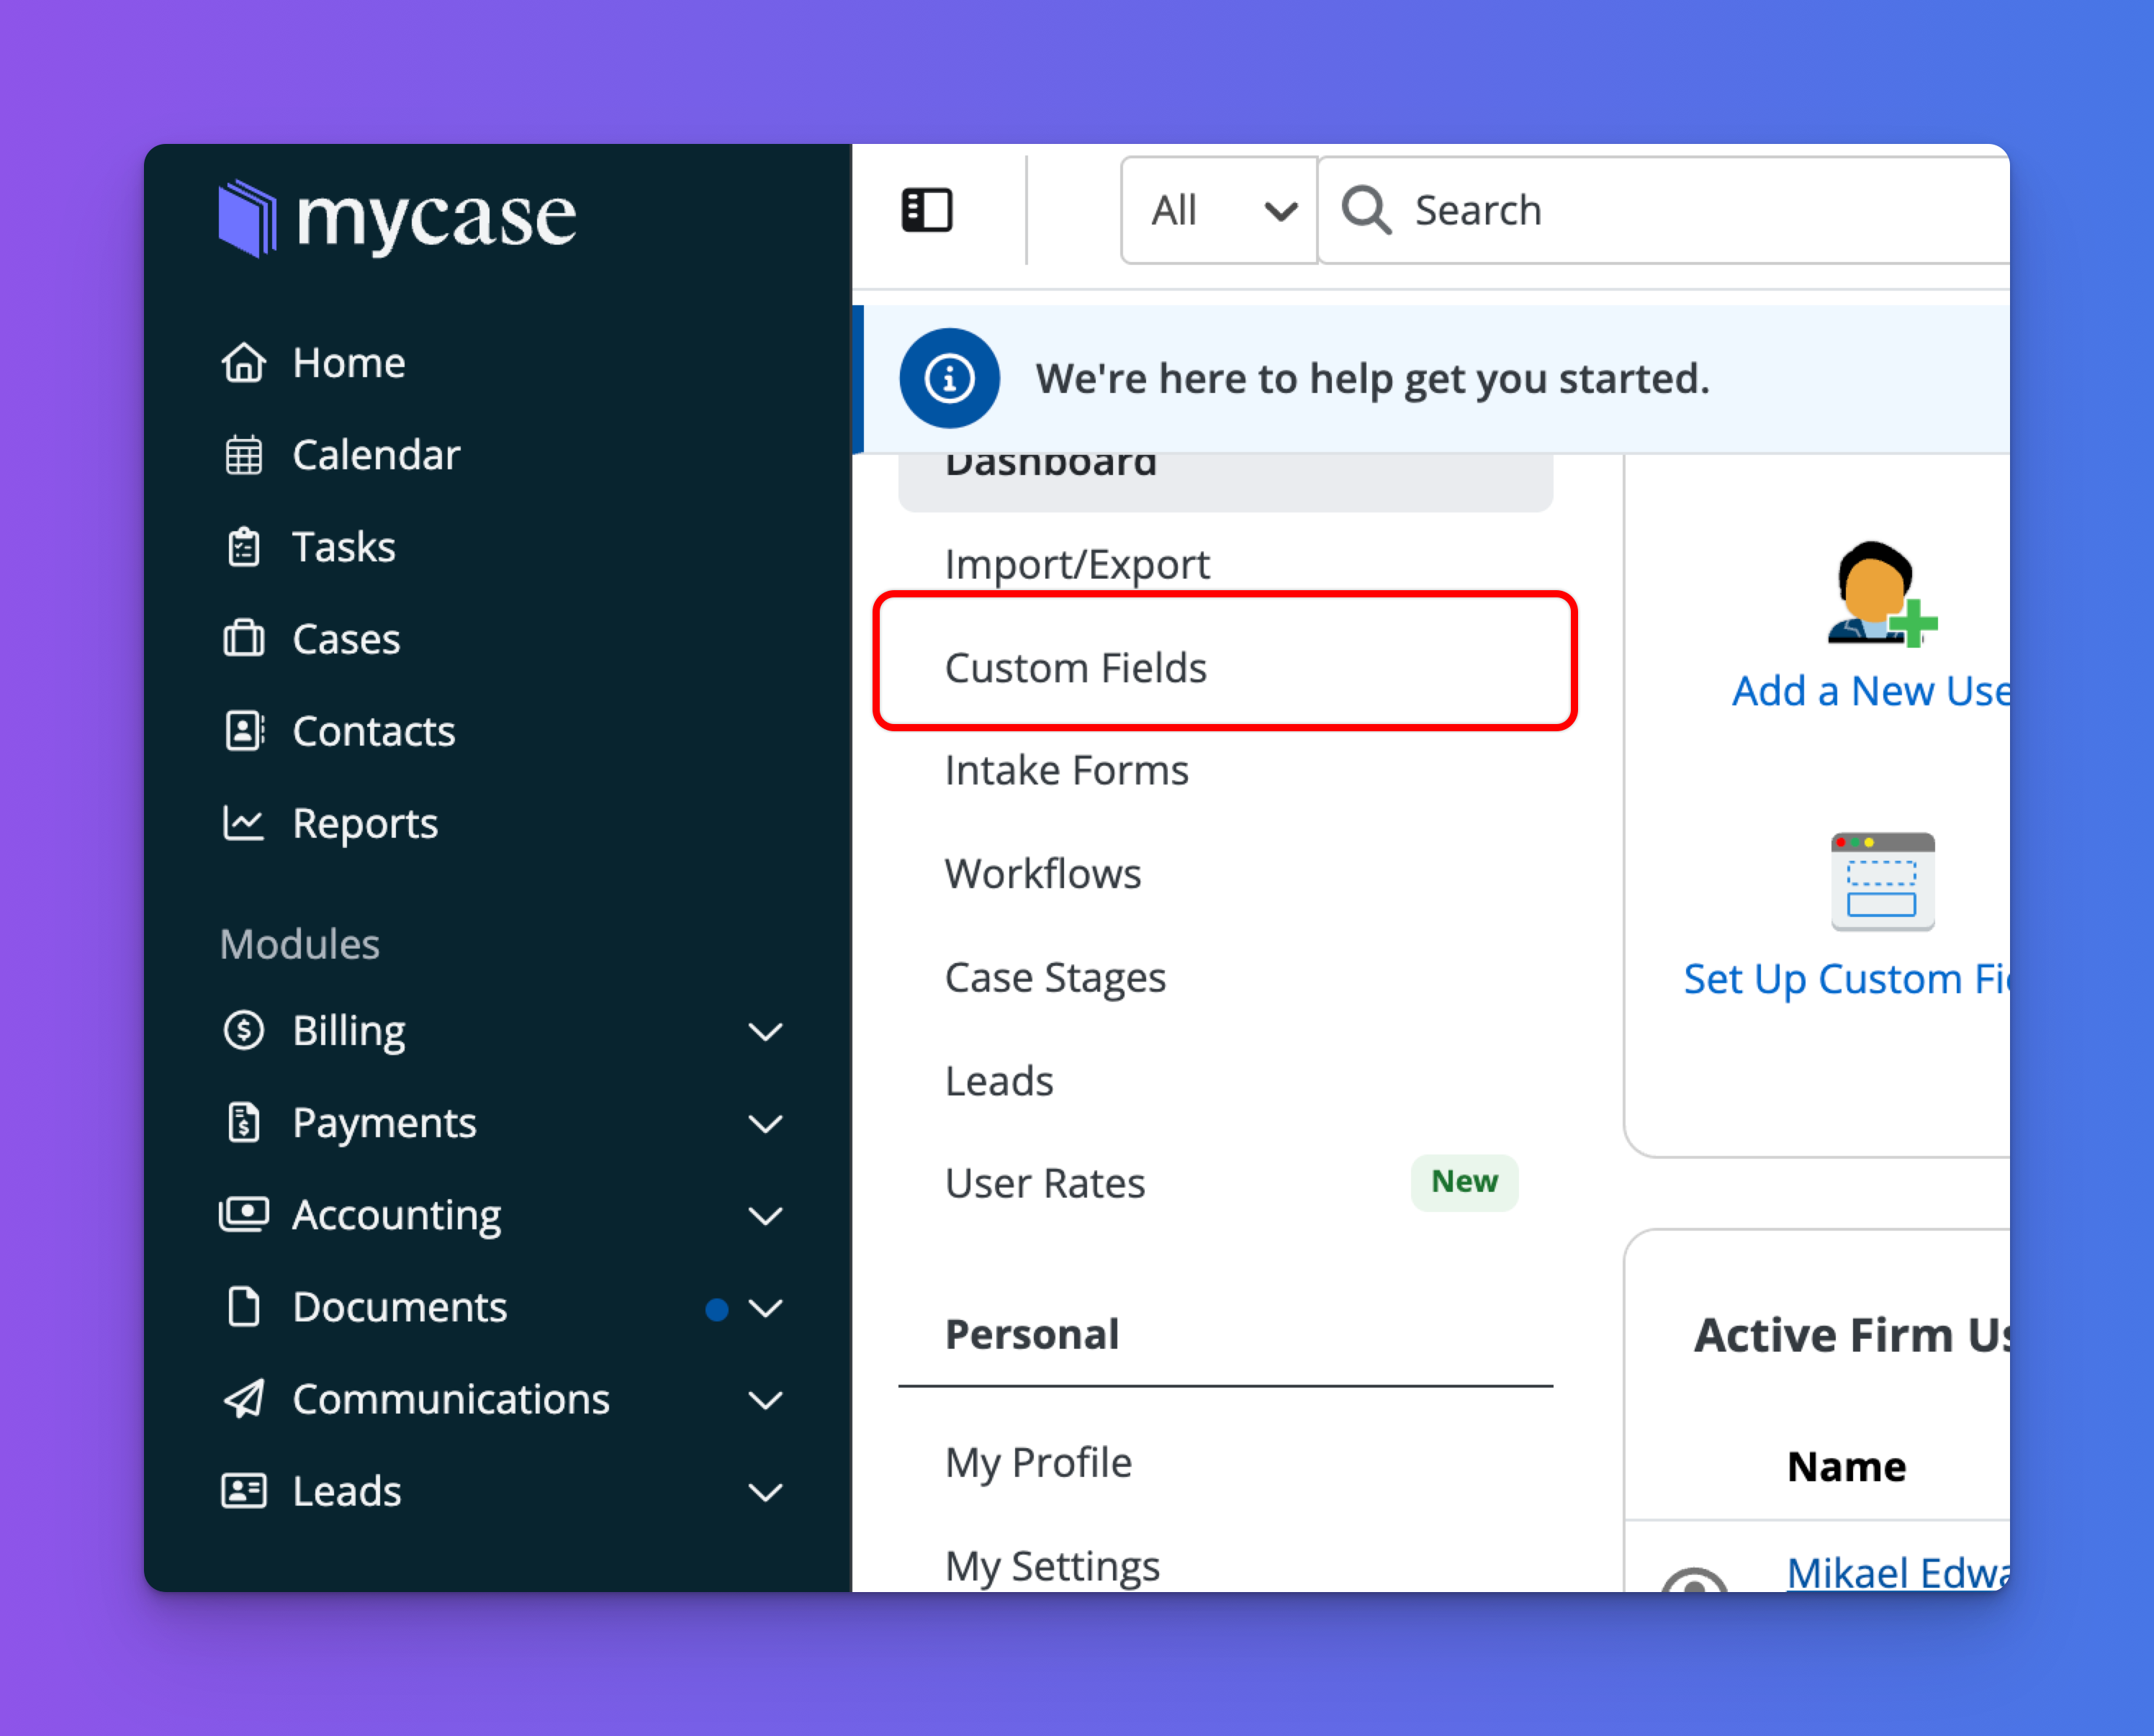
Click the Custom Fields tab.
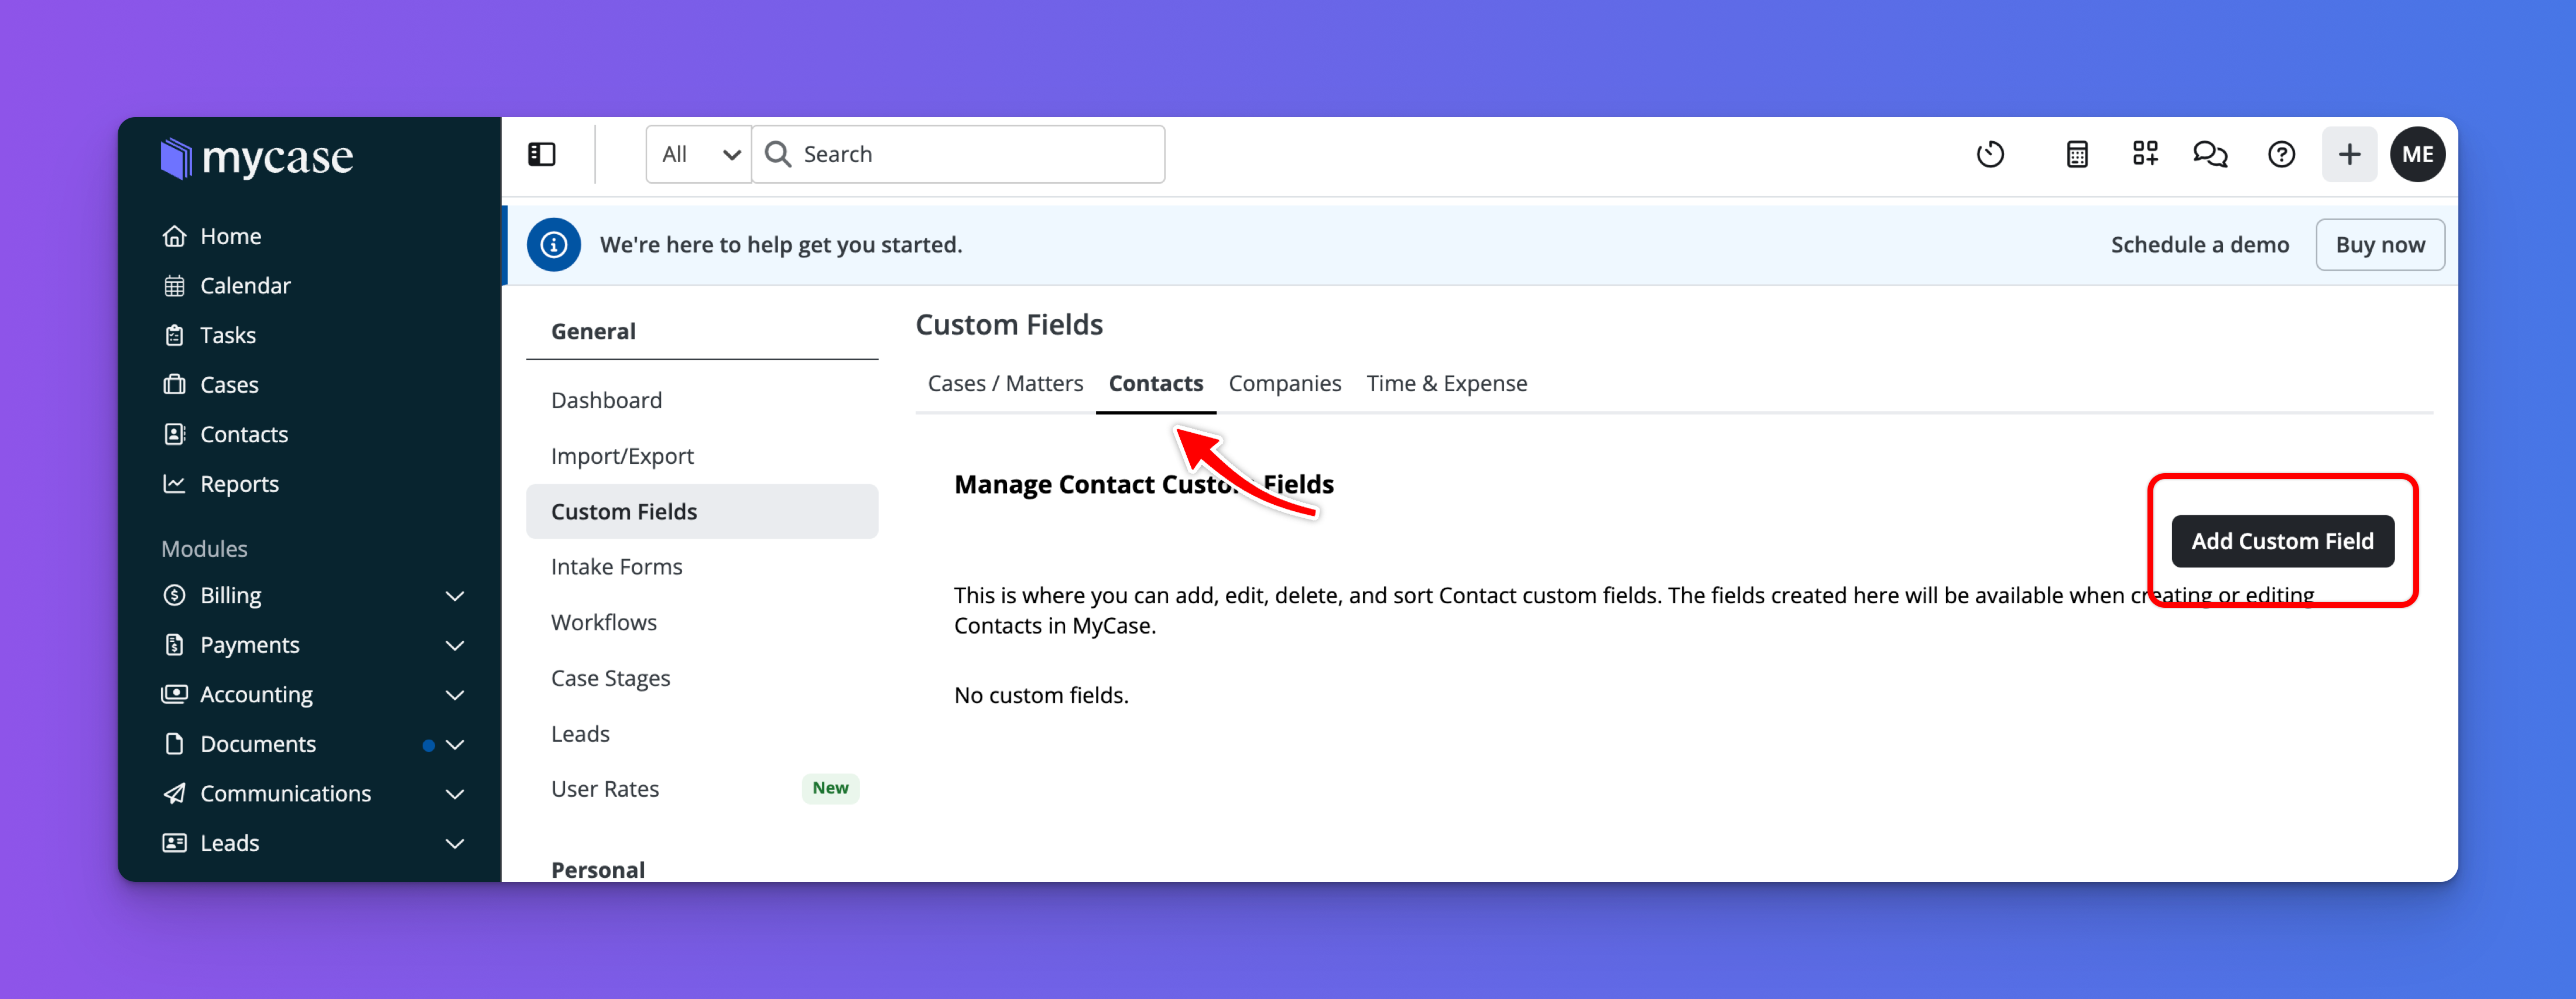
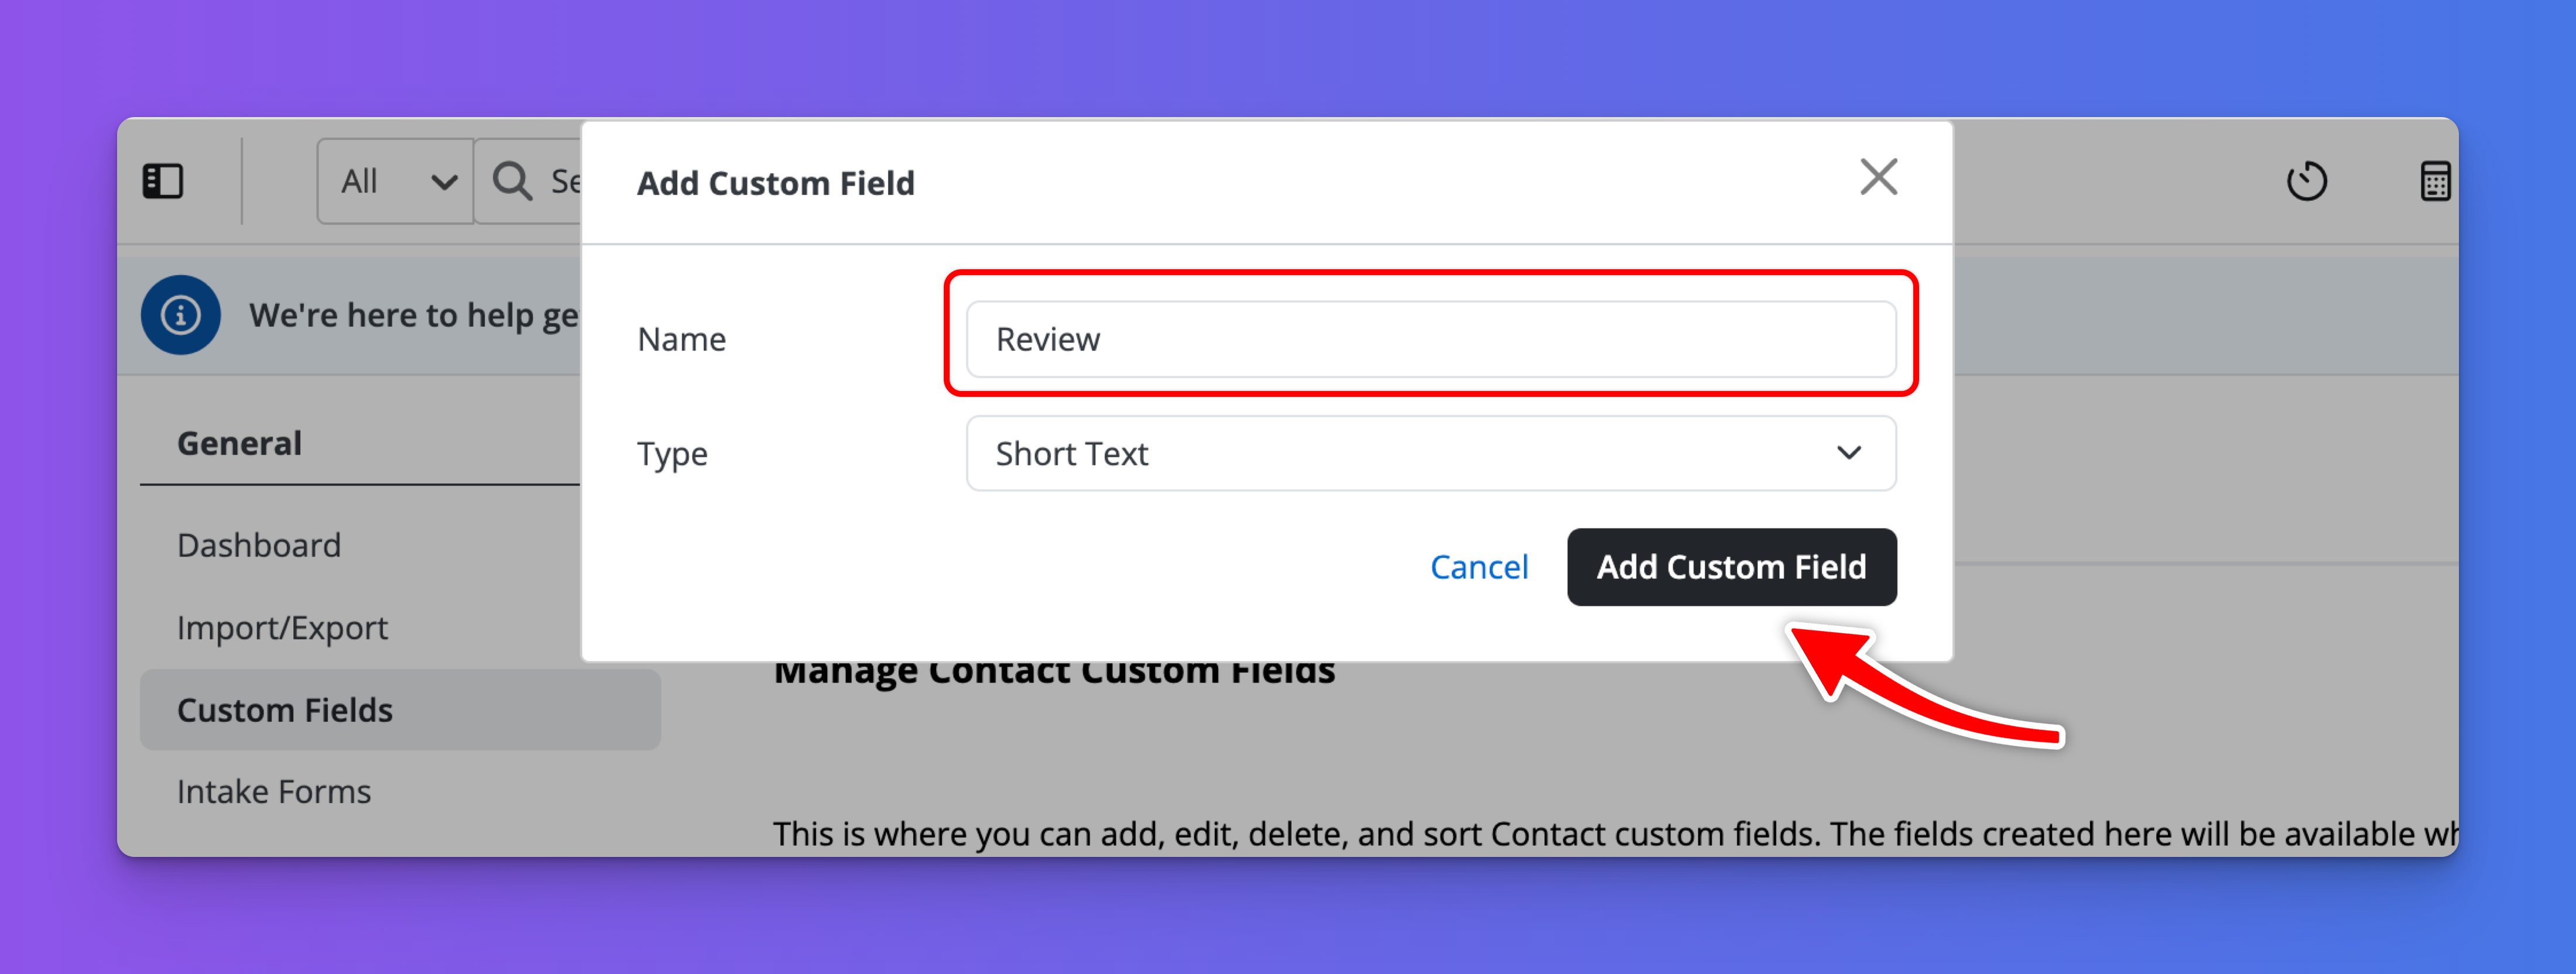
Under the Contacts tab, click the Add Custom Field button.
Add a Name, like "Review" and click the Add Custom Field button.
Now that the Custom Field is set up, go to the Contacts tab from the left-hand menu.

Find an existing contact to use, or create a new one for testing purposes.
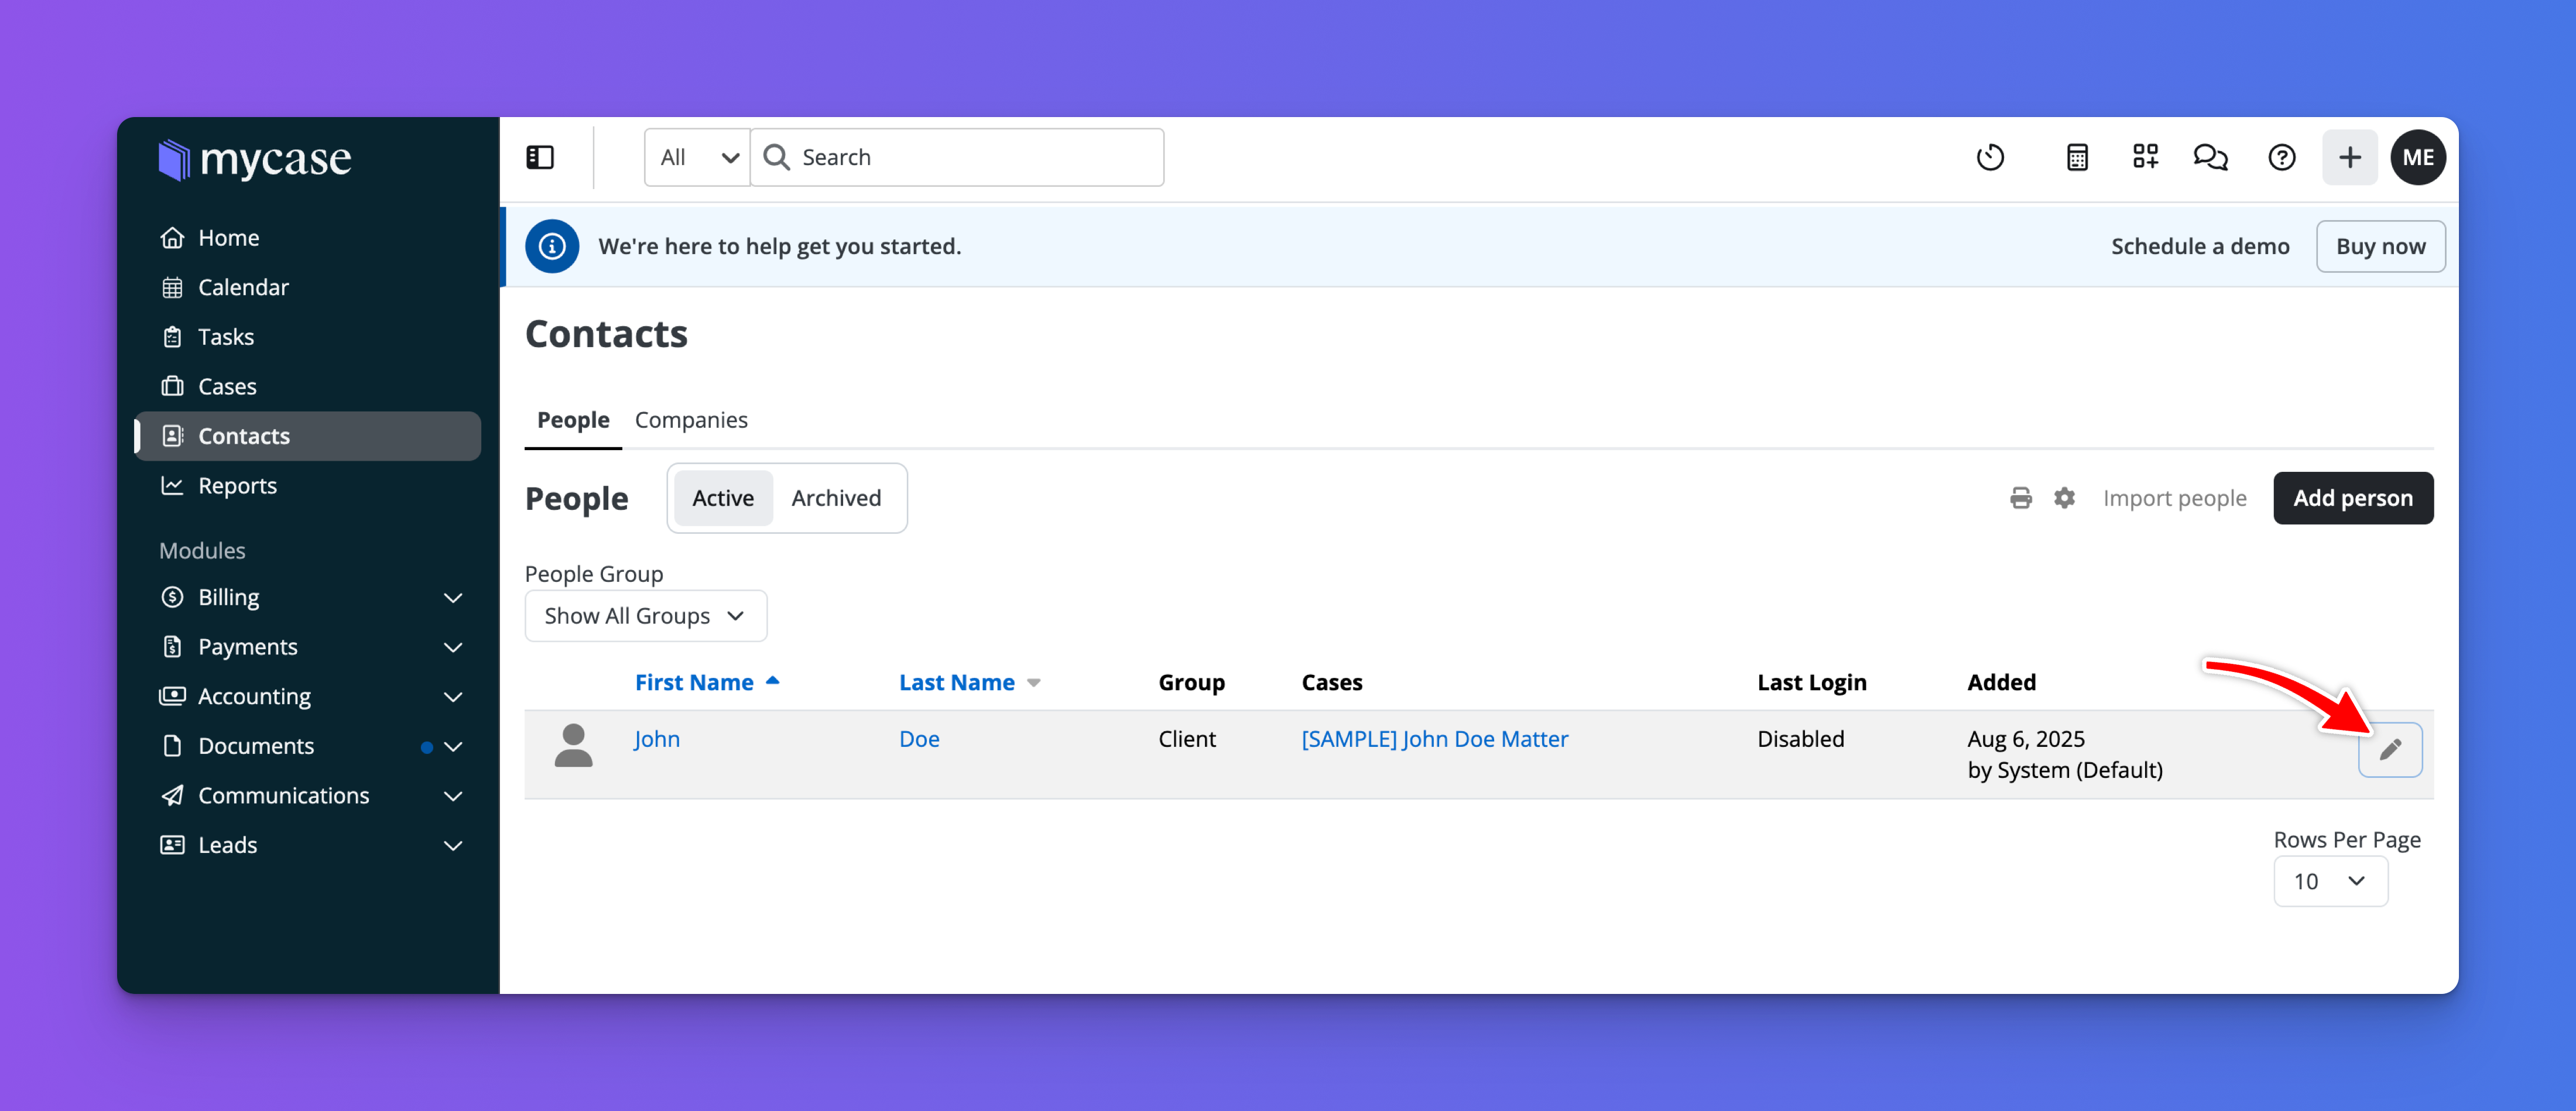
Click the Edit icon to the right of the contact row.
Then, click on Custom Fields to display the custom field you added in the previous steps.

Next to the Review custom field, enter the text you’d like to use as the trigger. For this demo, we’ll use “Request Review”. This means whenever you’re ready to send a review request to a customer, simply type “Request Review” in the custom field and click Save Person.
Now, let’s head over to Zapier to create our automation.
In Zapier, click the Create button, then select Zaps to start building your workflow.

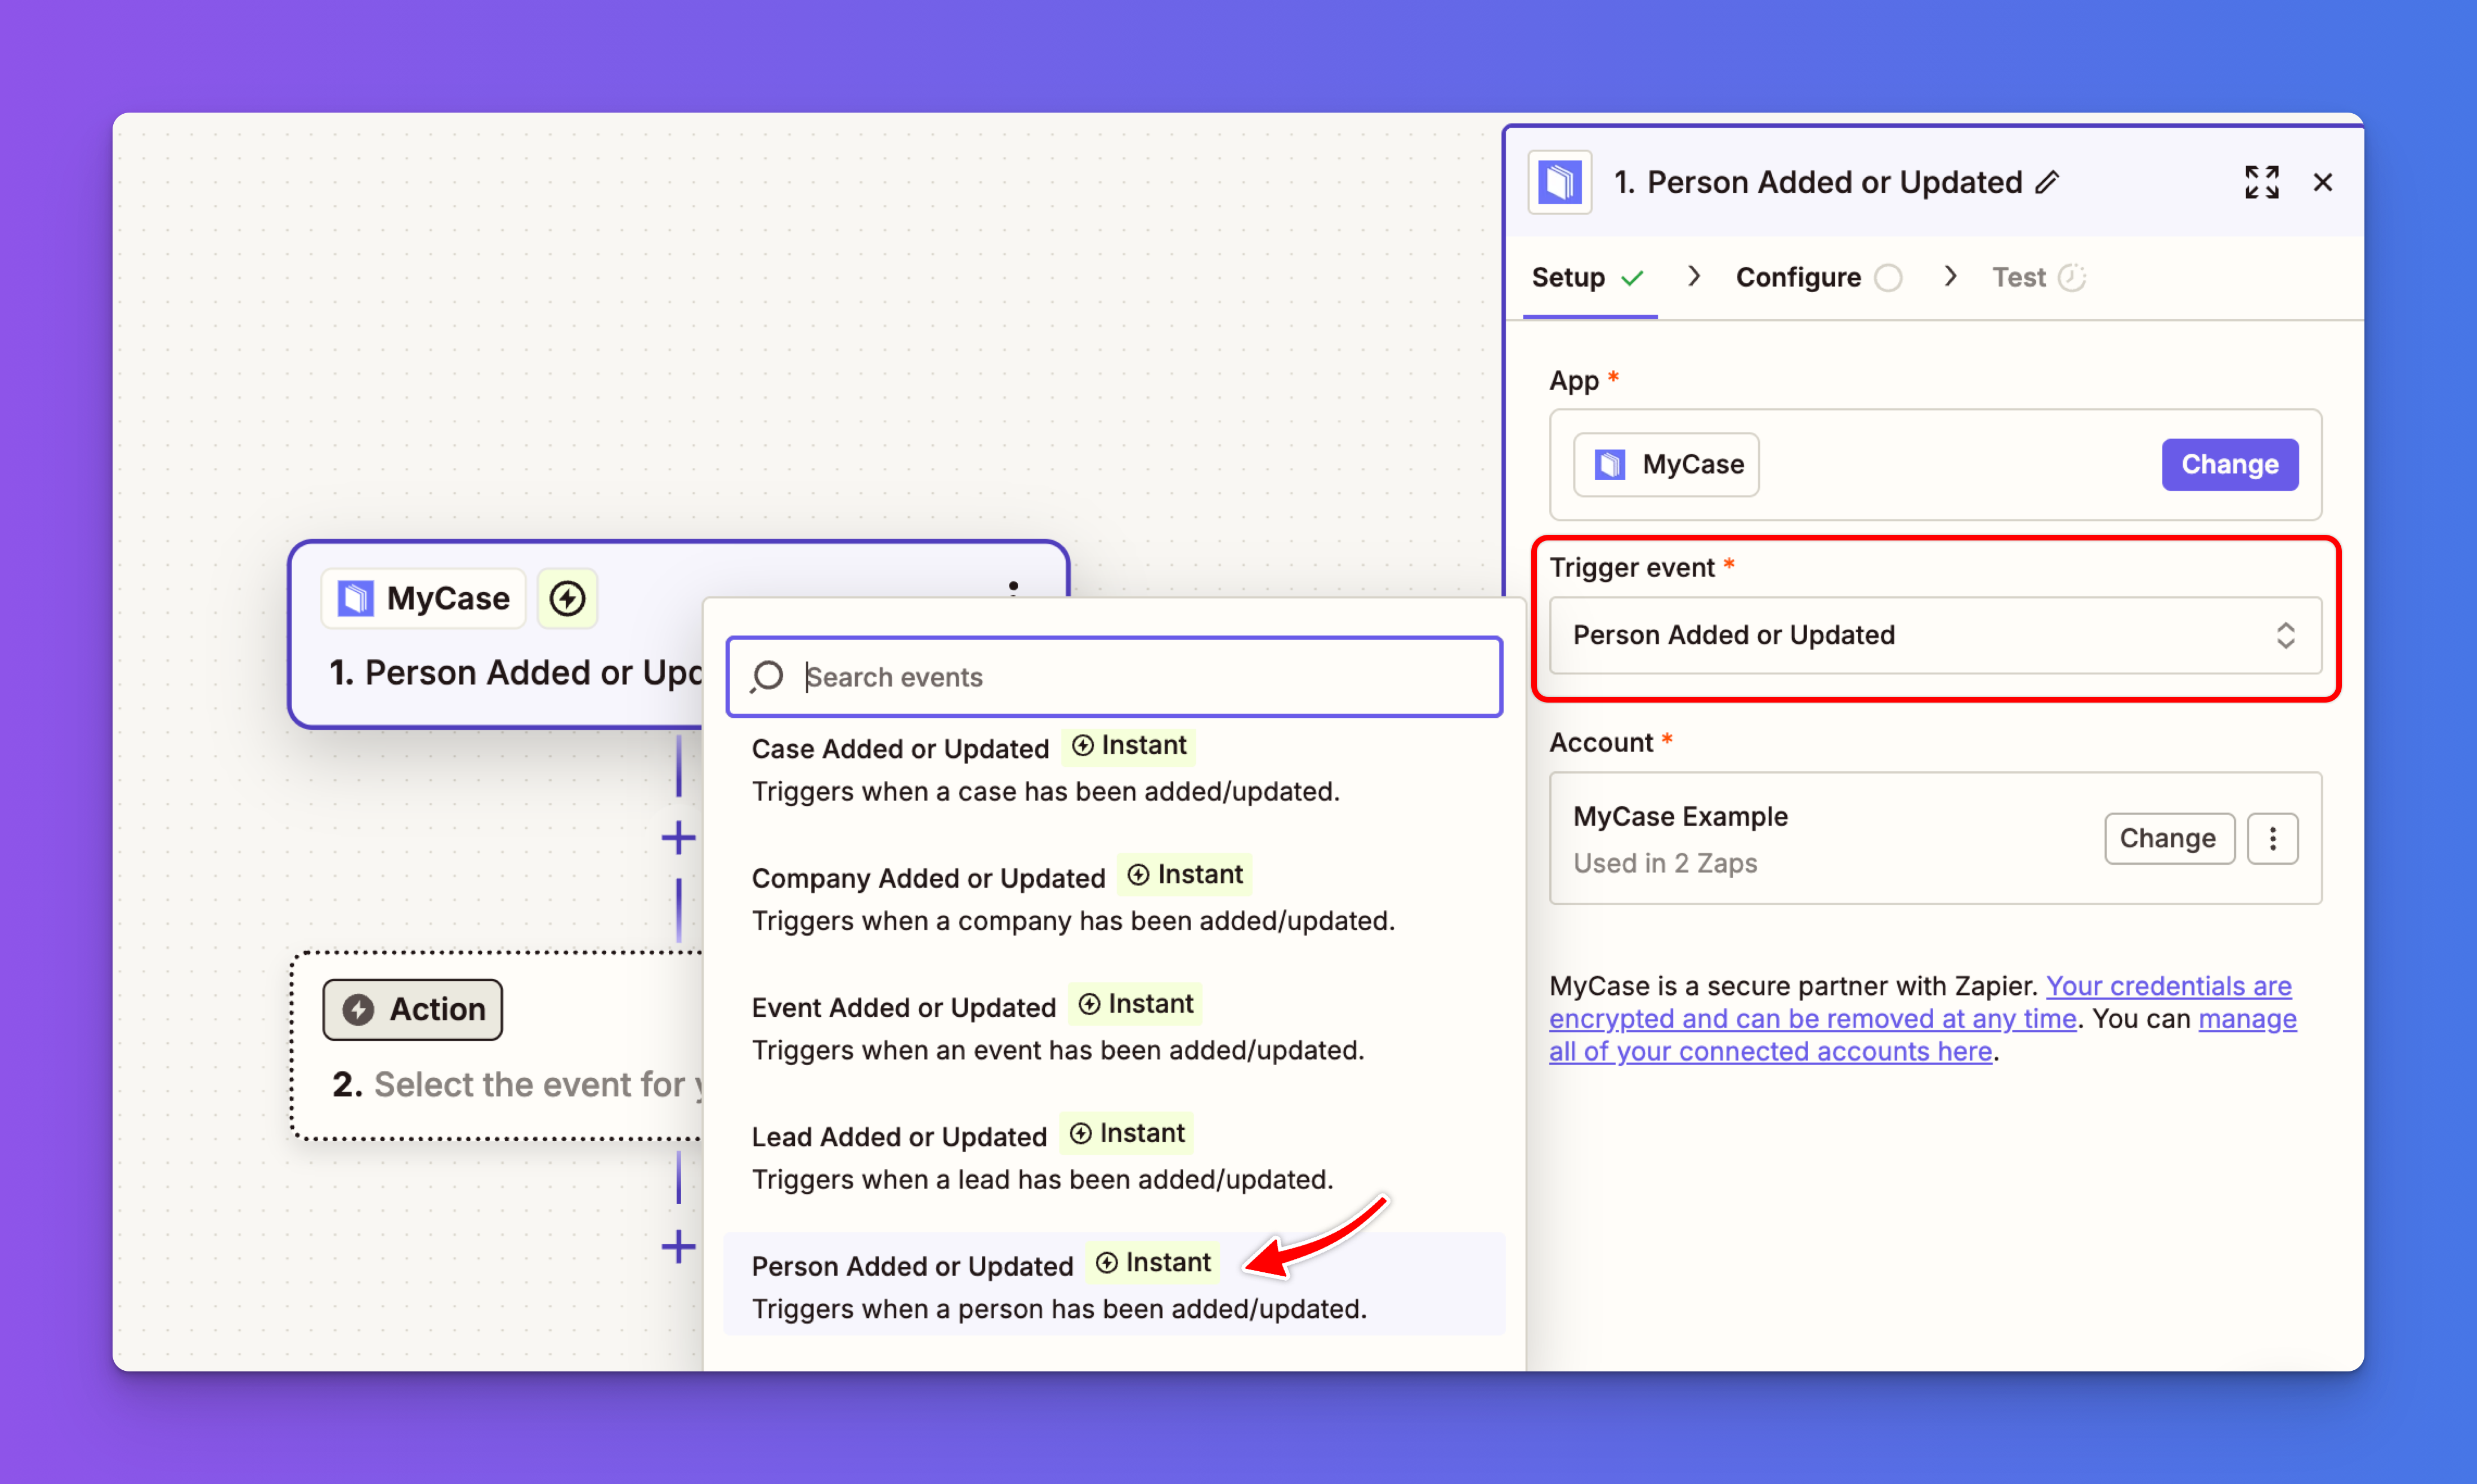
Click the Trigger box, then search for and select MyCase as your trigger app.

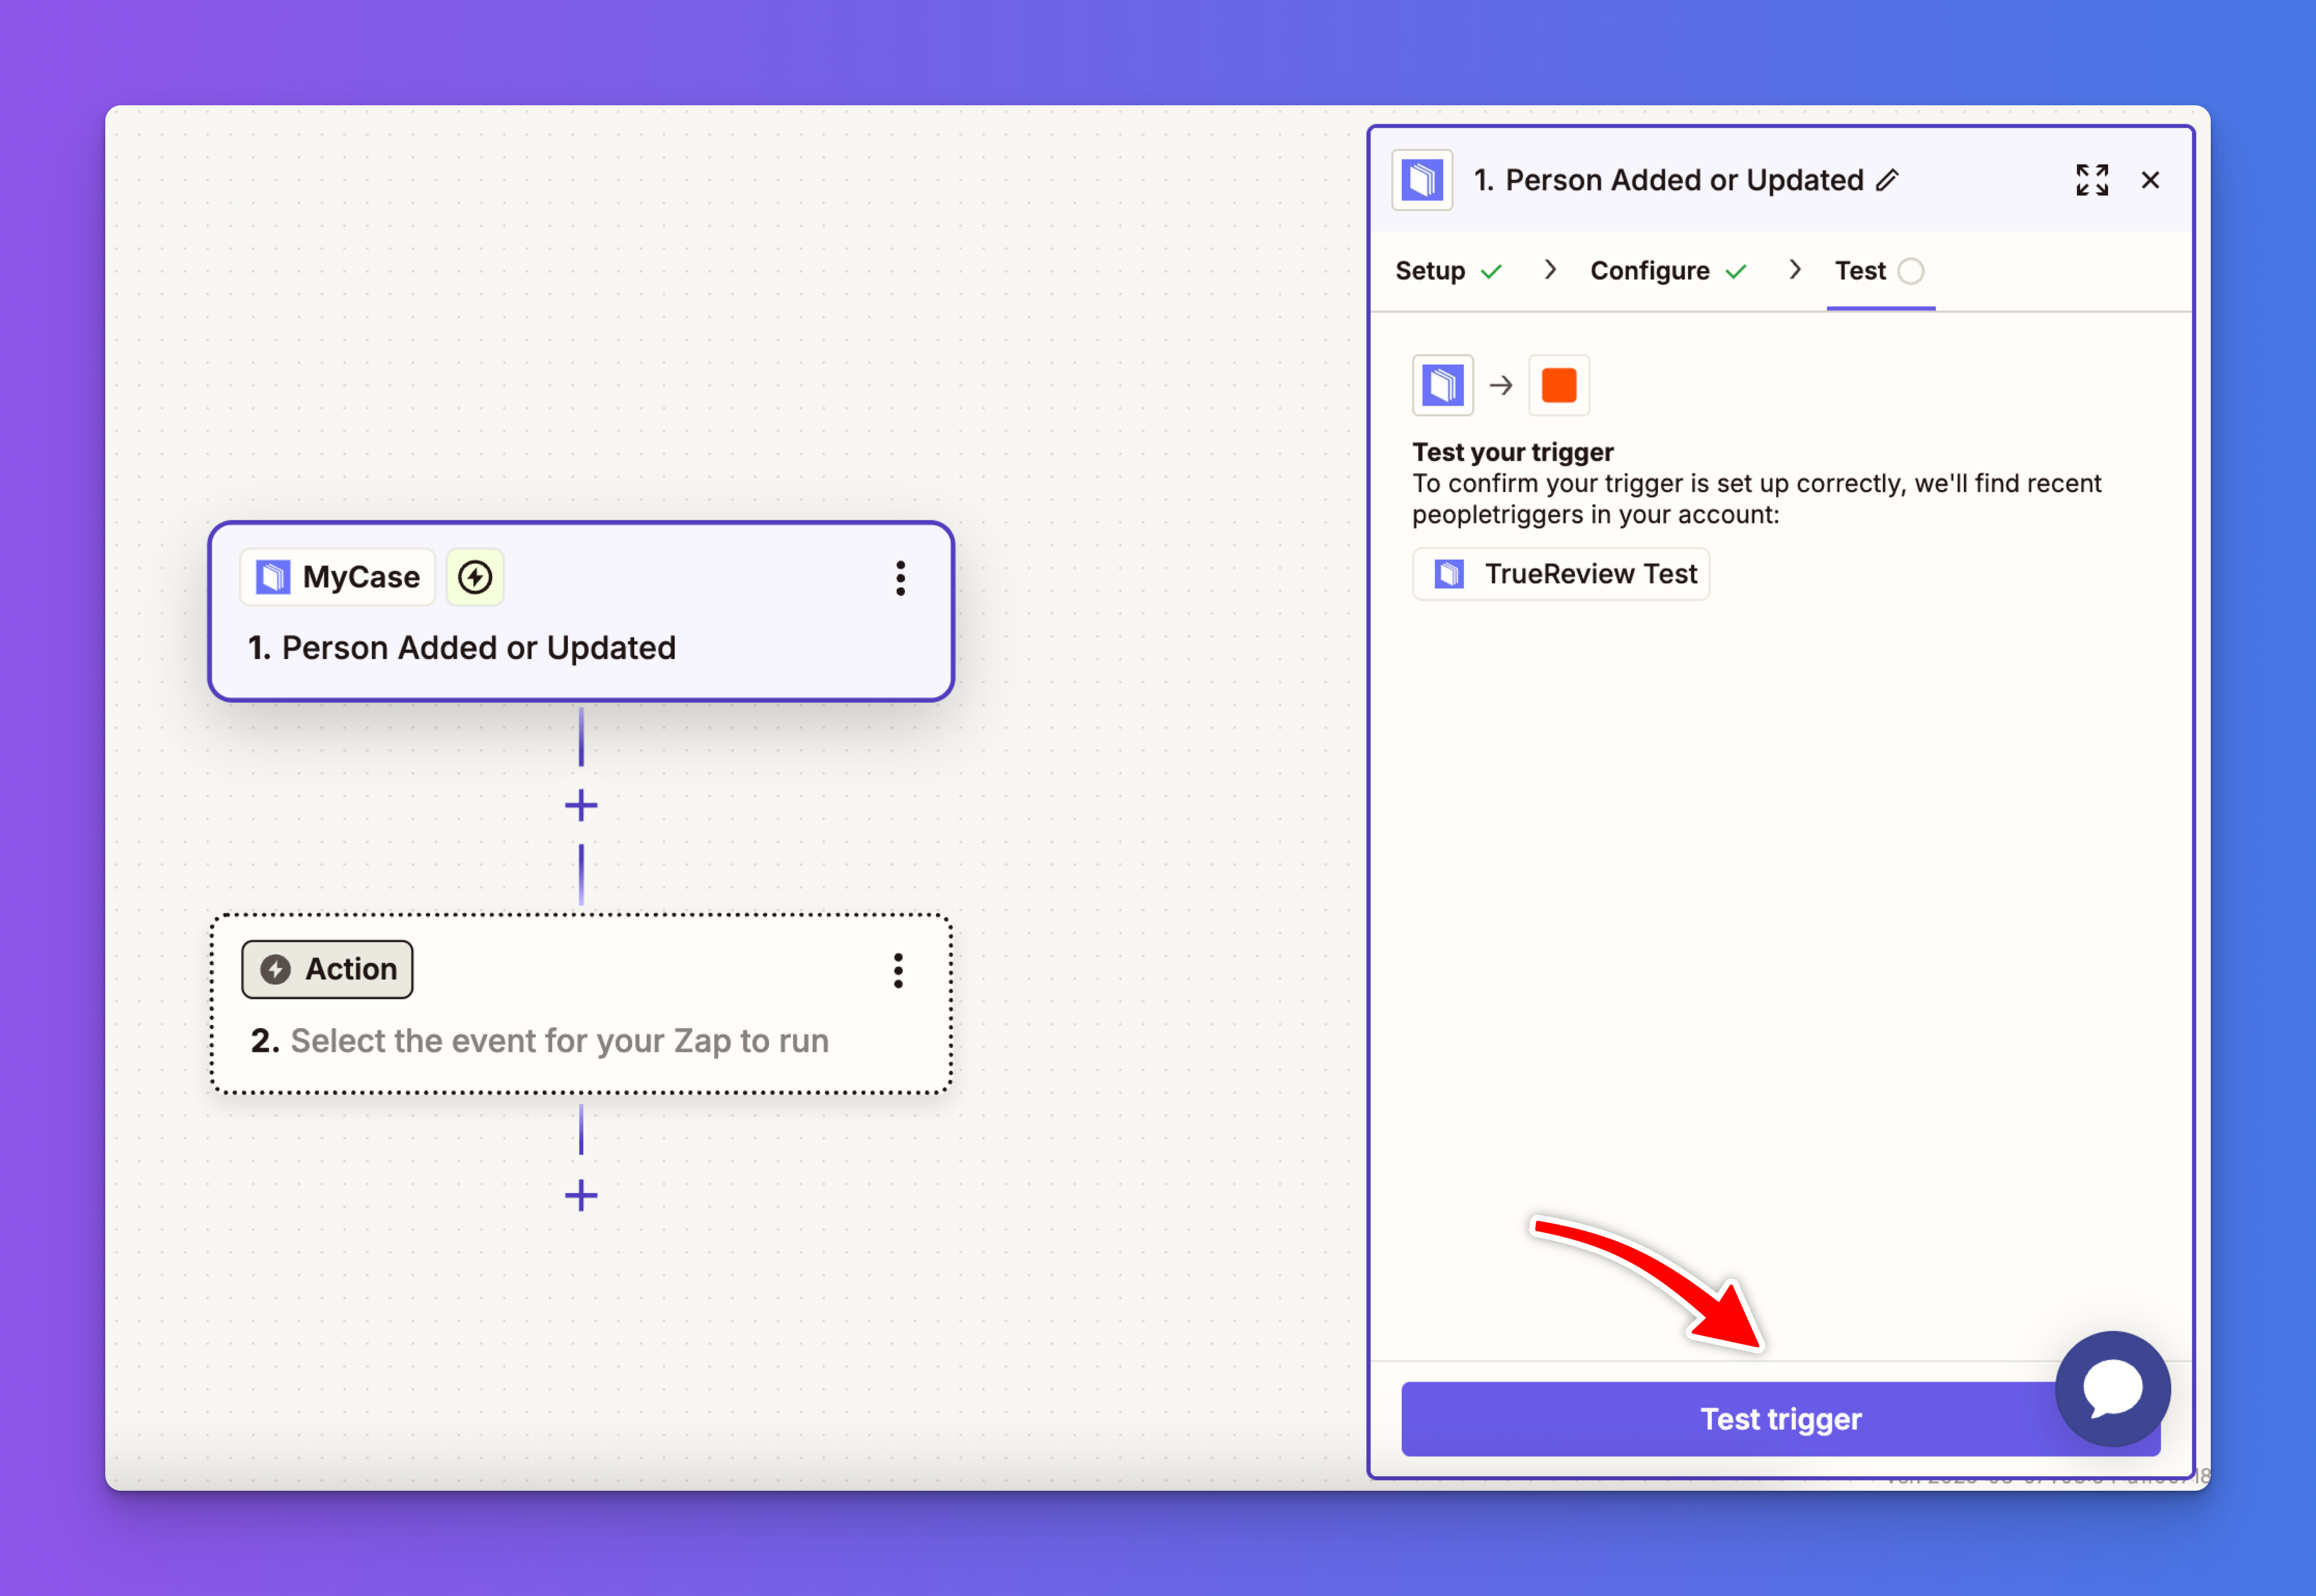
Under Trigger Event, select Person Added or Updated, then click Continue to proceed.
When prompted under Account, connect your MyCase account by logging in and authorizing access. Once connected, click Continue to move to the next step.
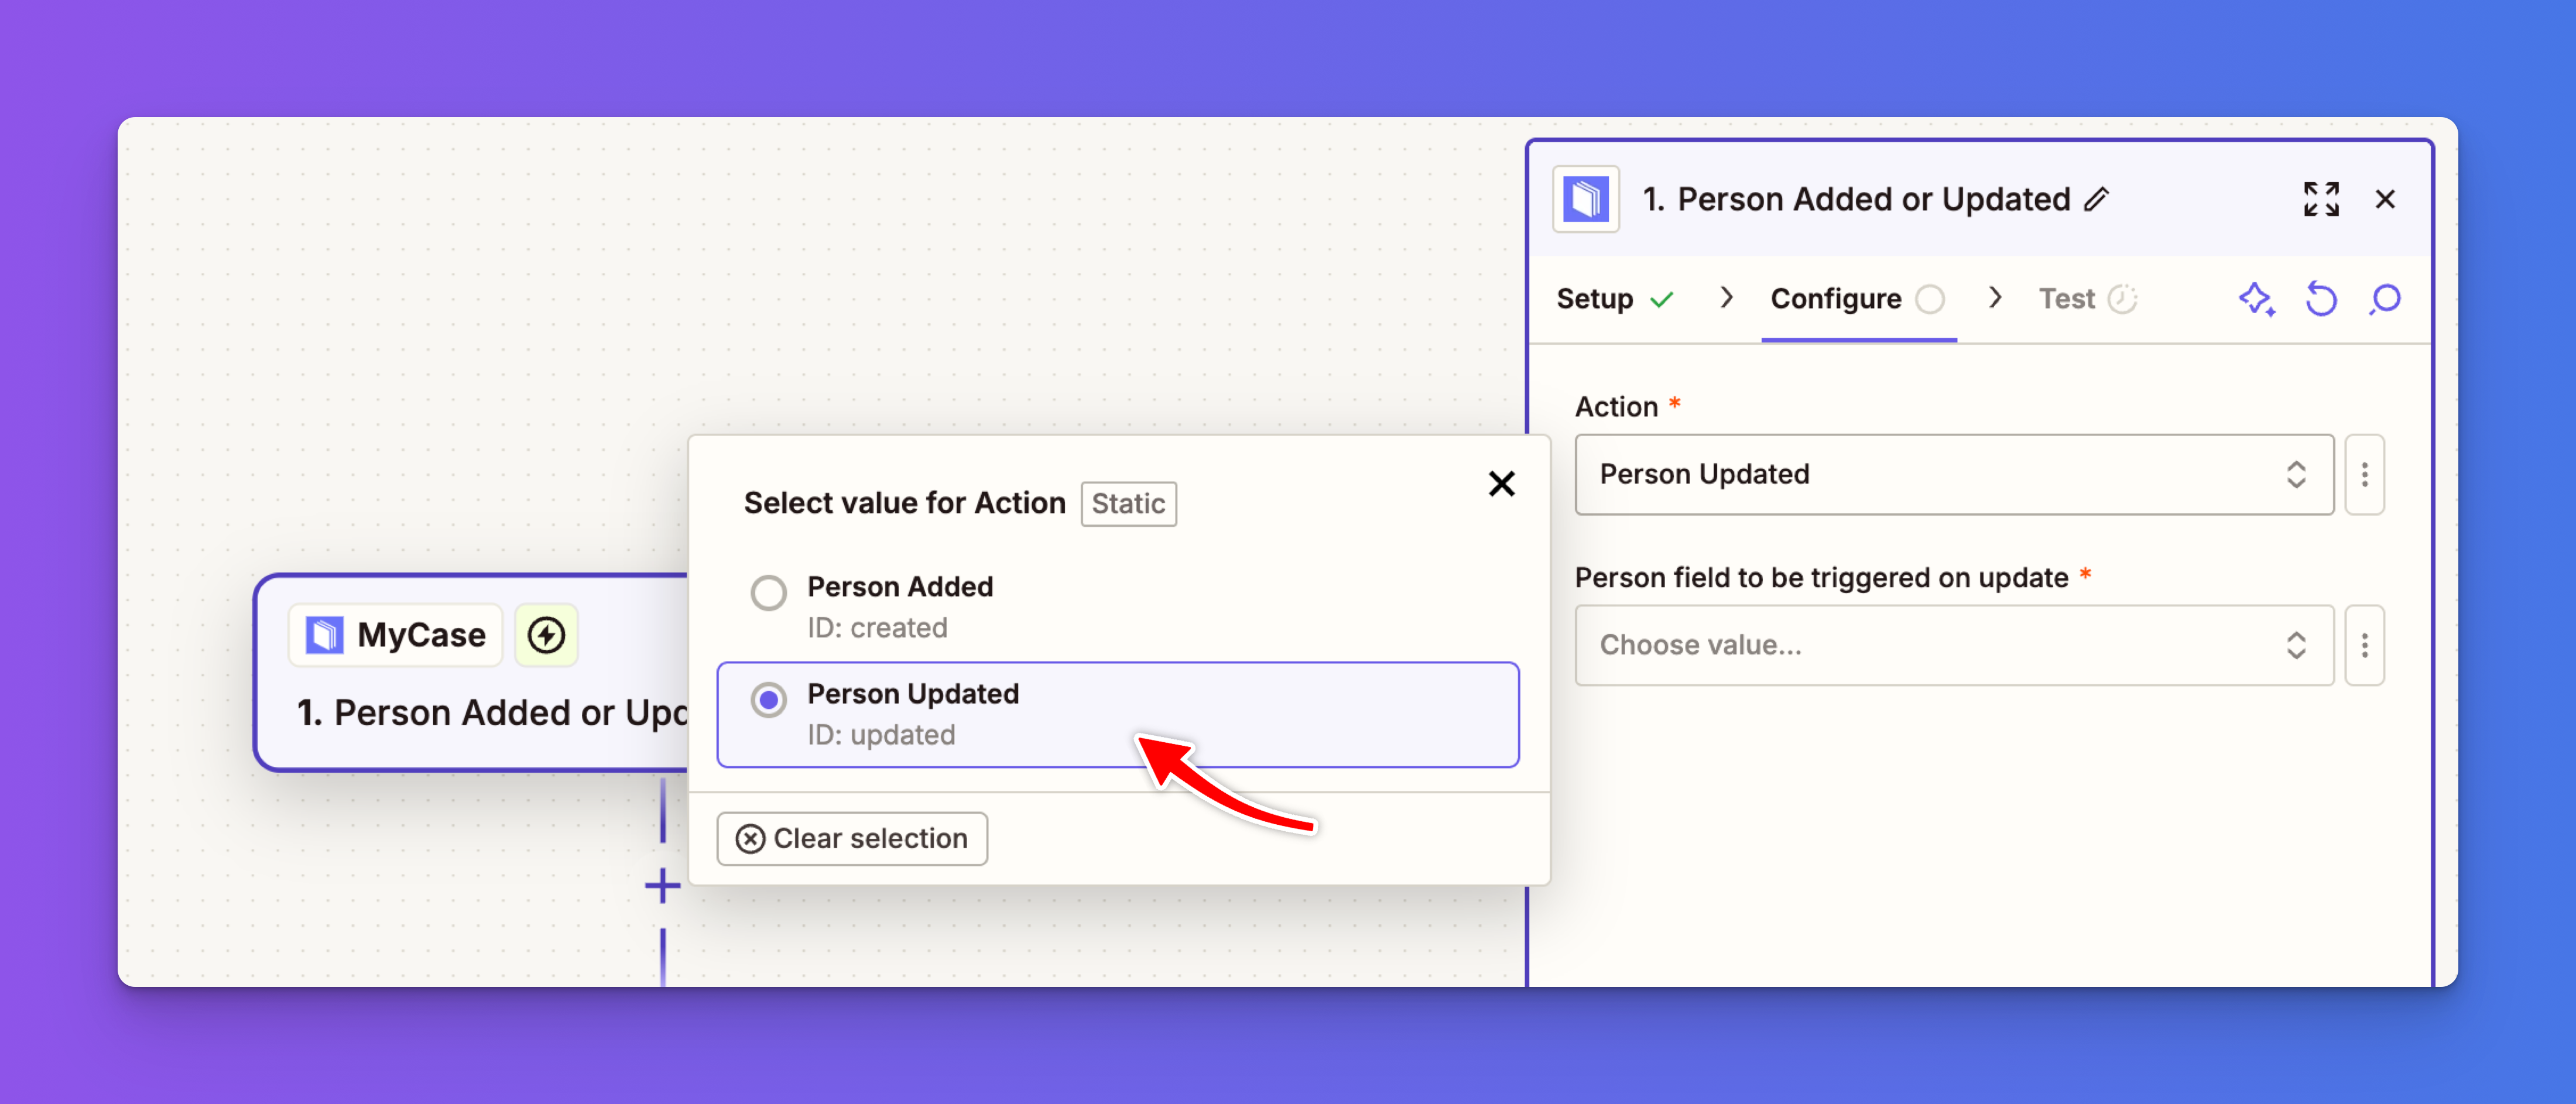
Under “Person field to be triggered on update,” find and select “Cell Phone Number”.
We’ll use this data in the next step to locate the customer’s information for the review request.

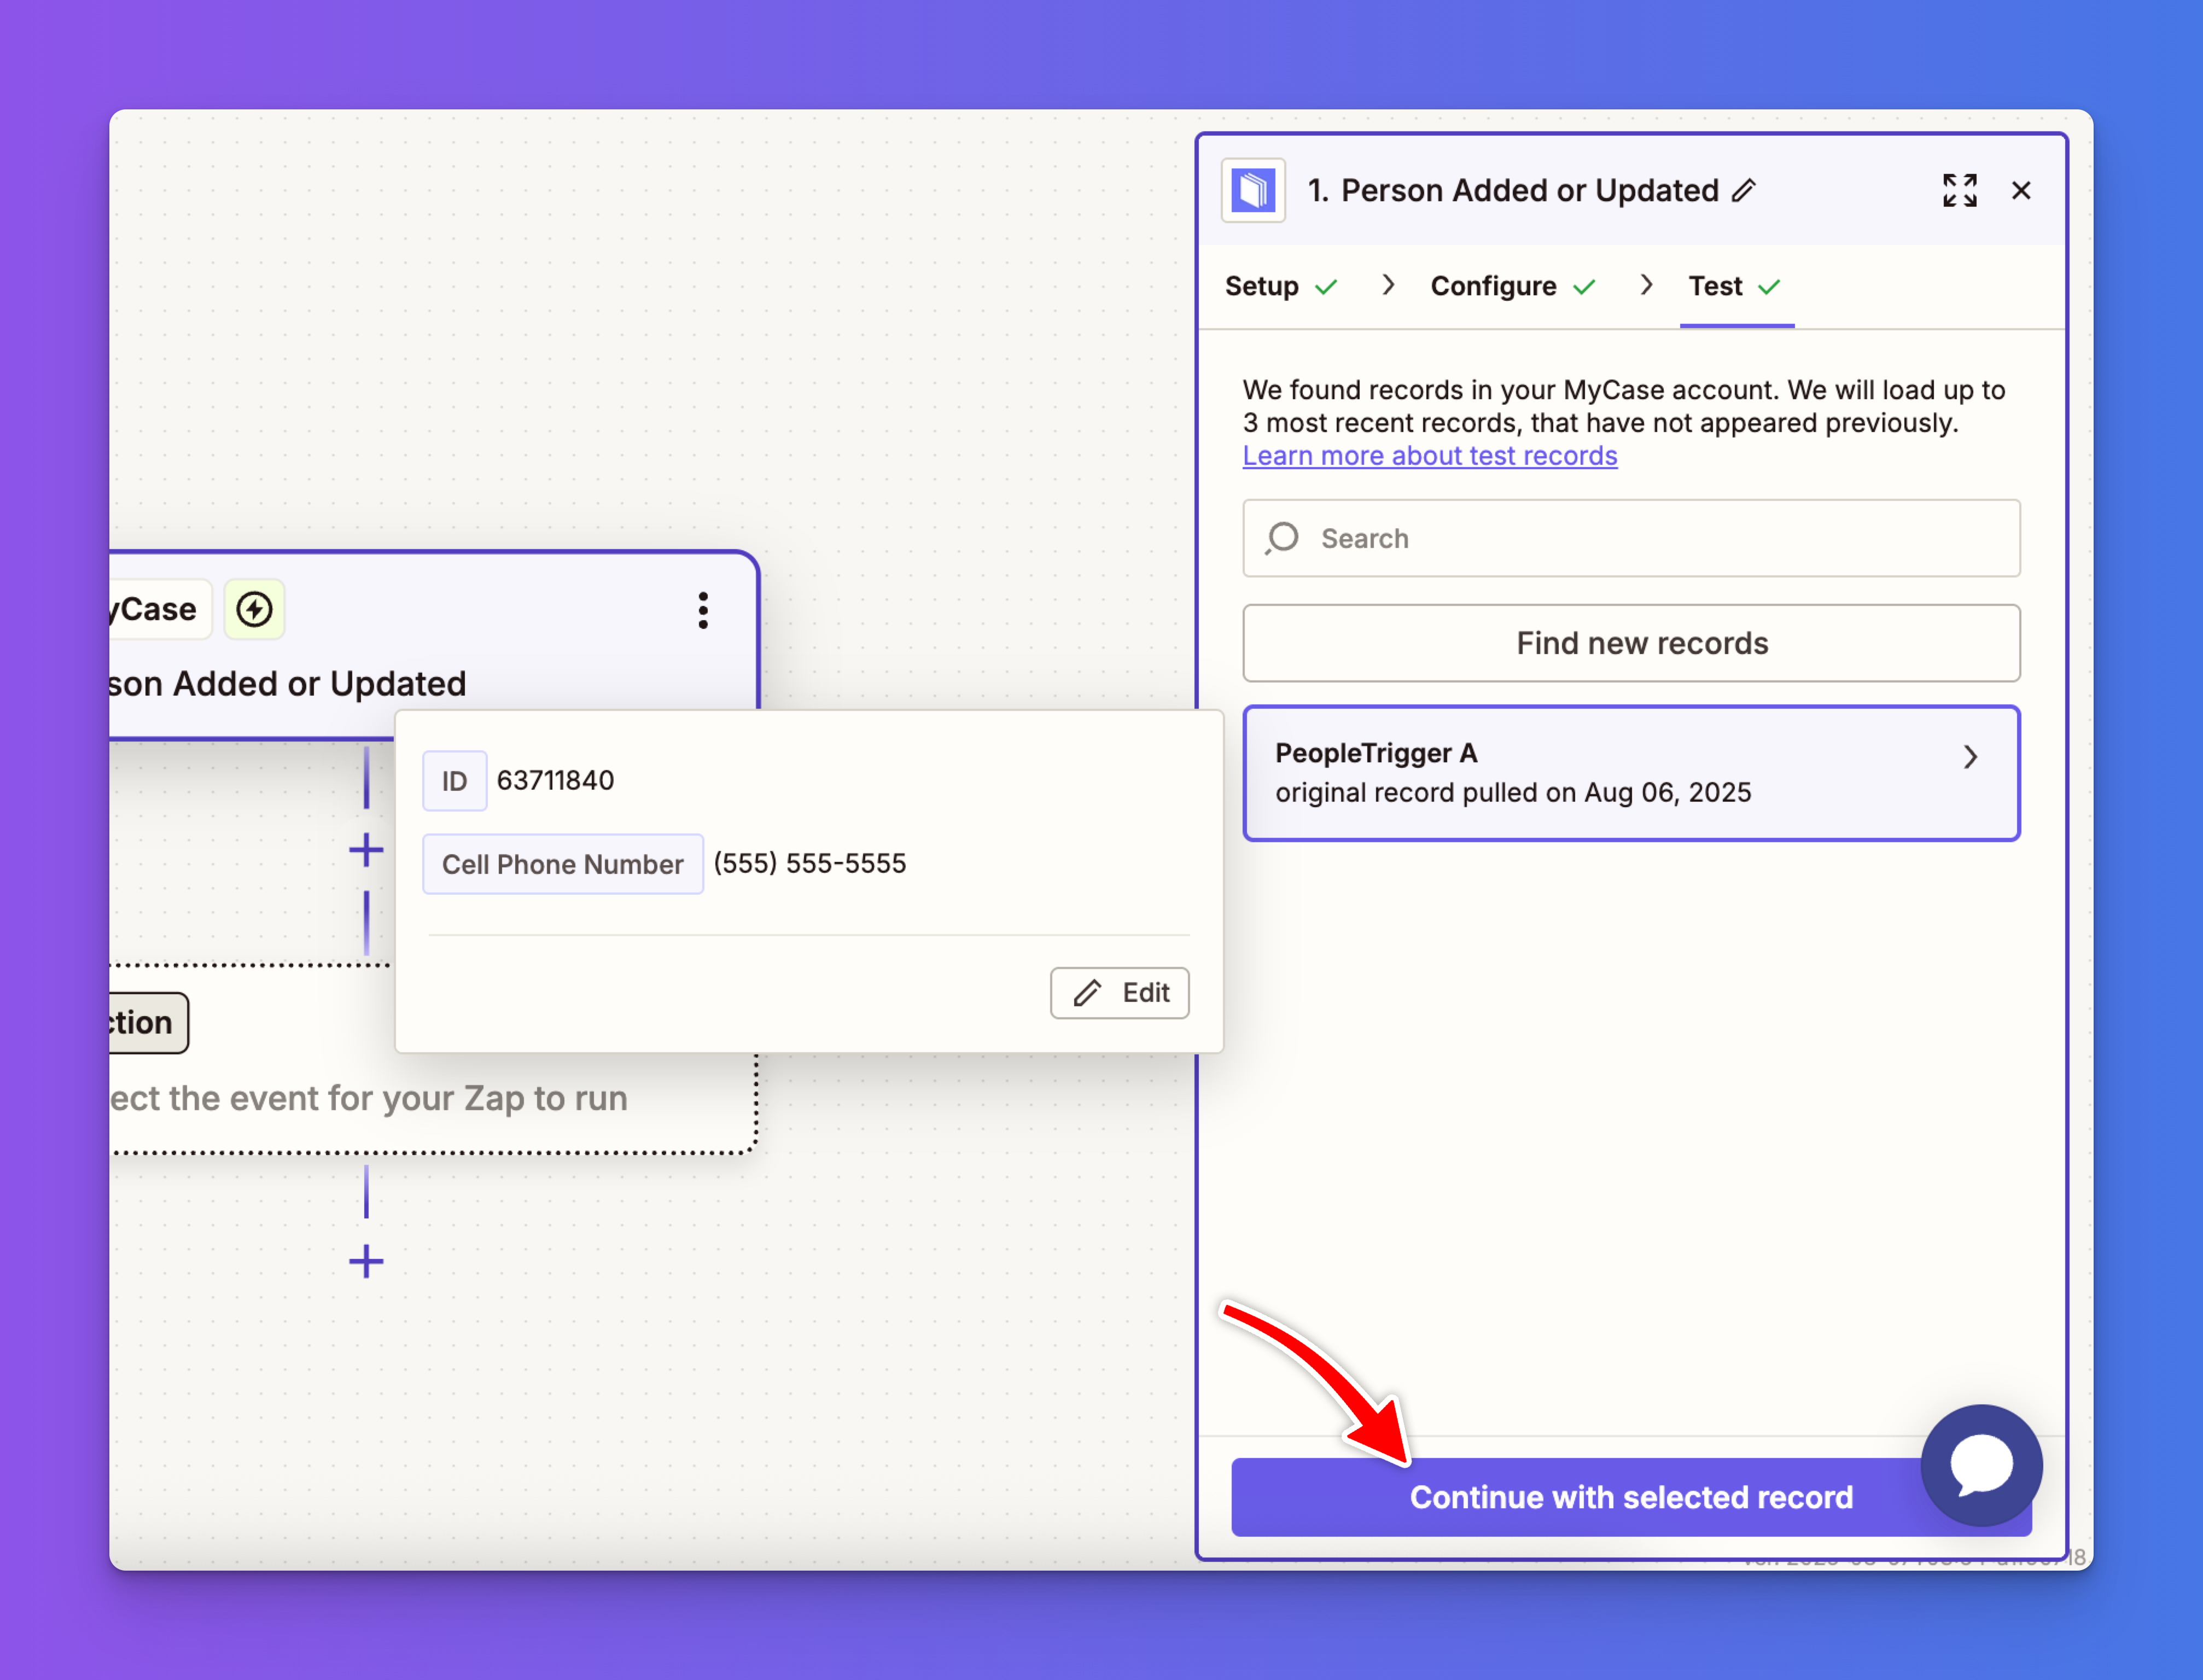
Continue by clicking the Test Trigger button to pull sample data from MyCase and ensure the trigger is working correctly.
You’ll see a list of your recent contacts. Select the appropriate contact, then click “Continue with selected record” to proceed.
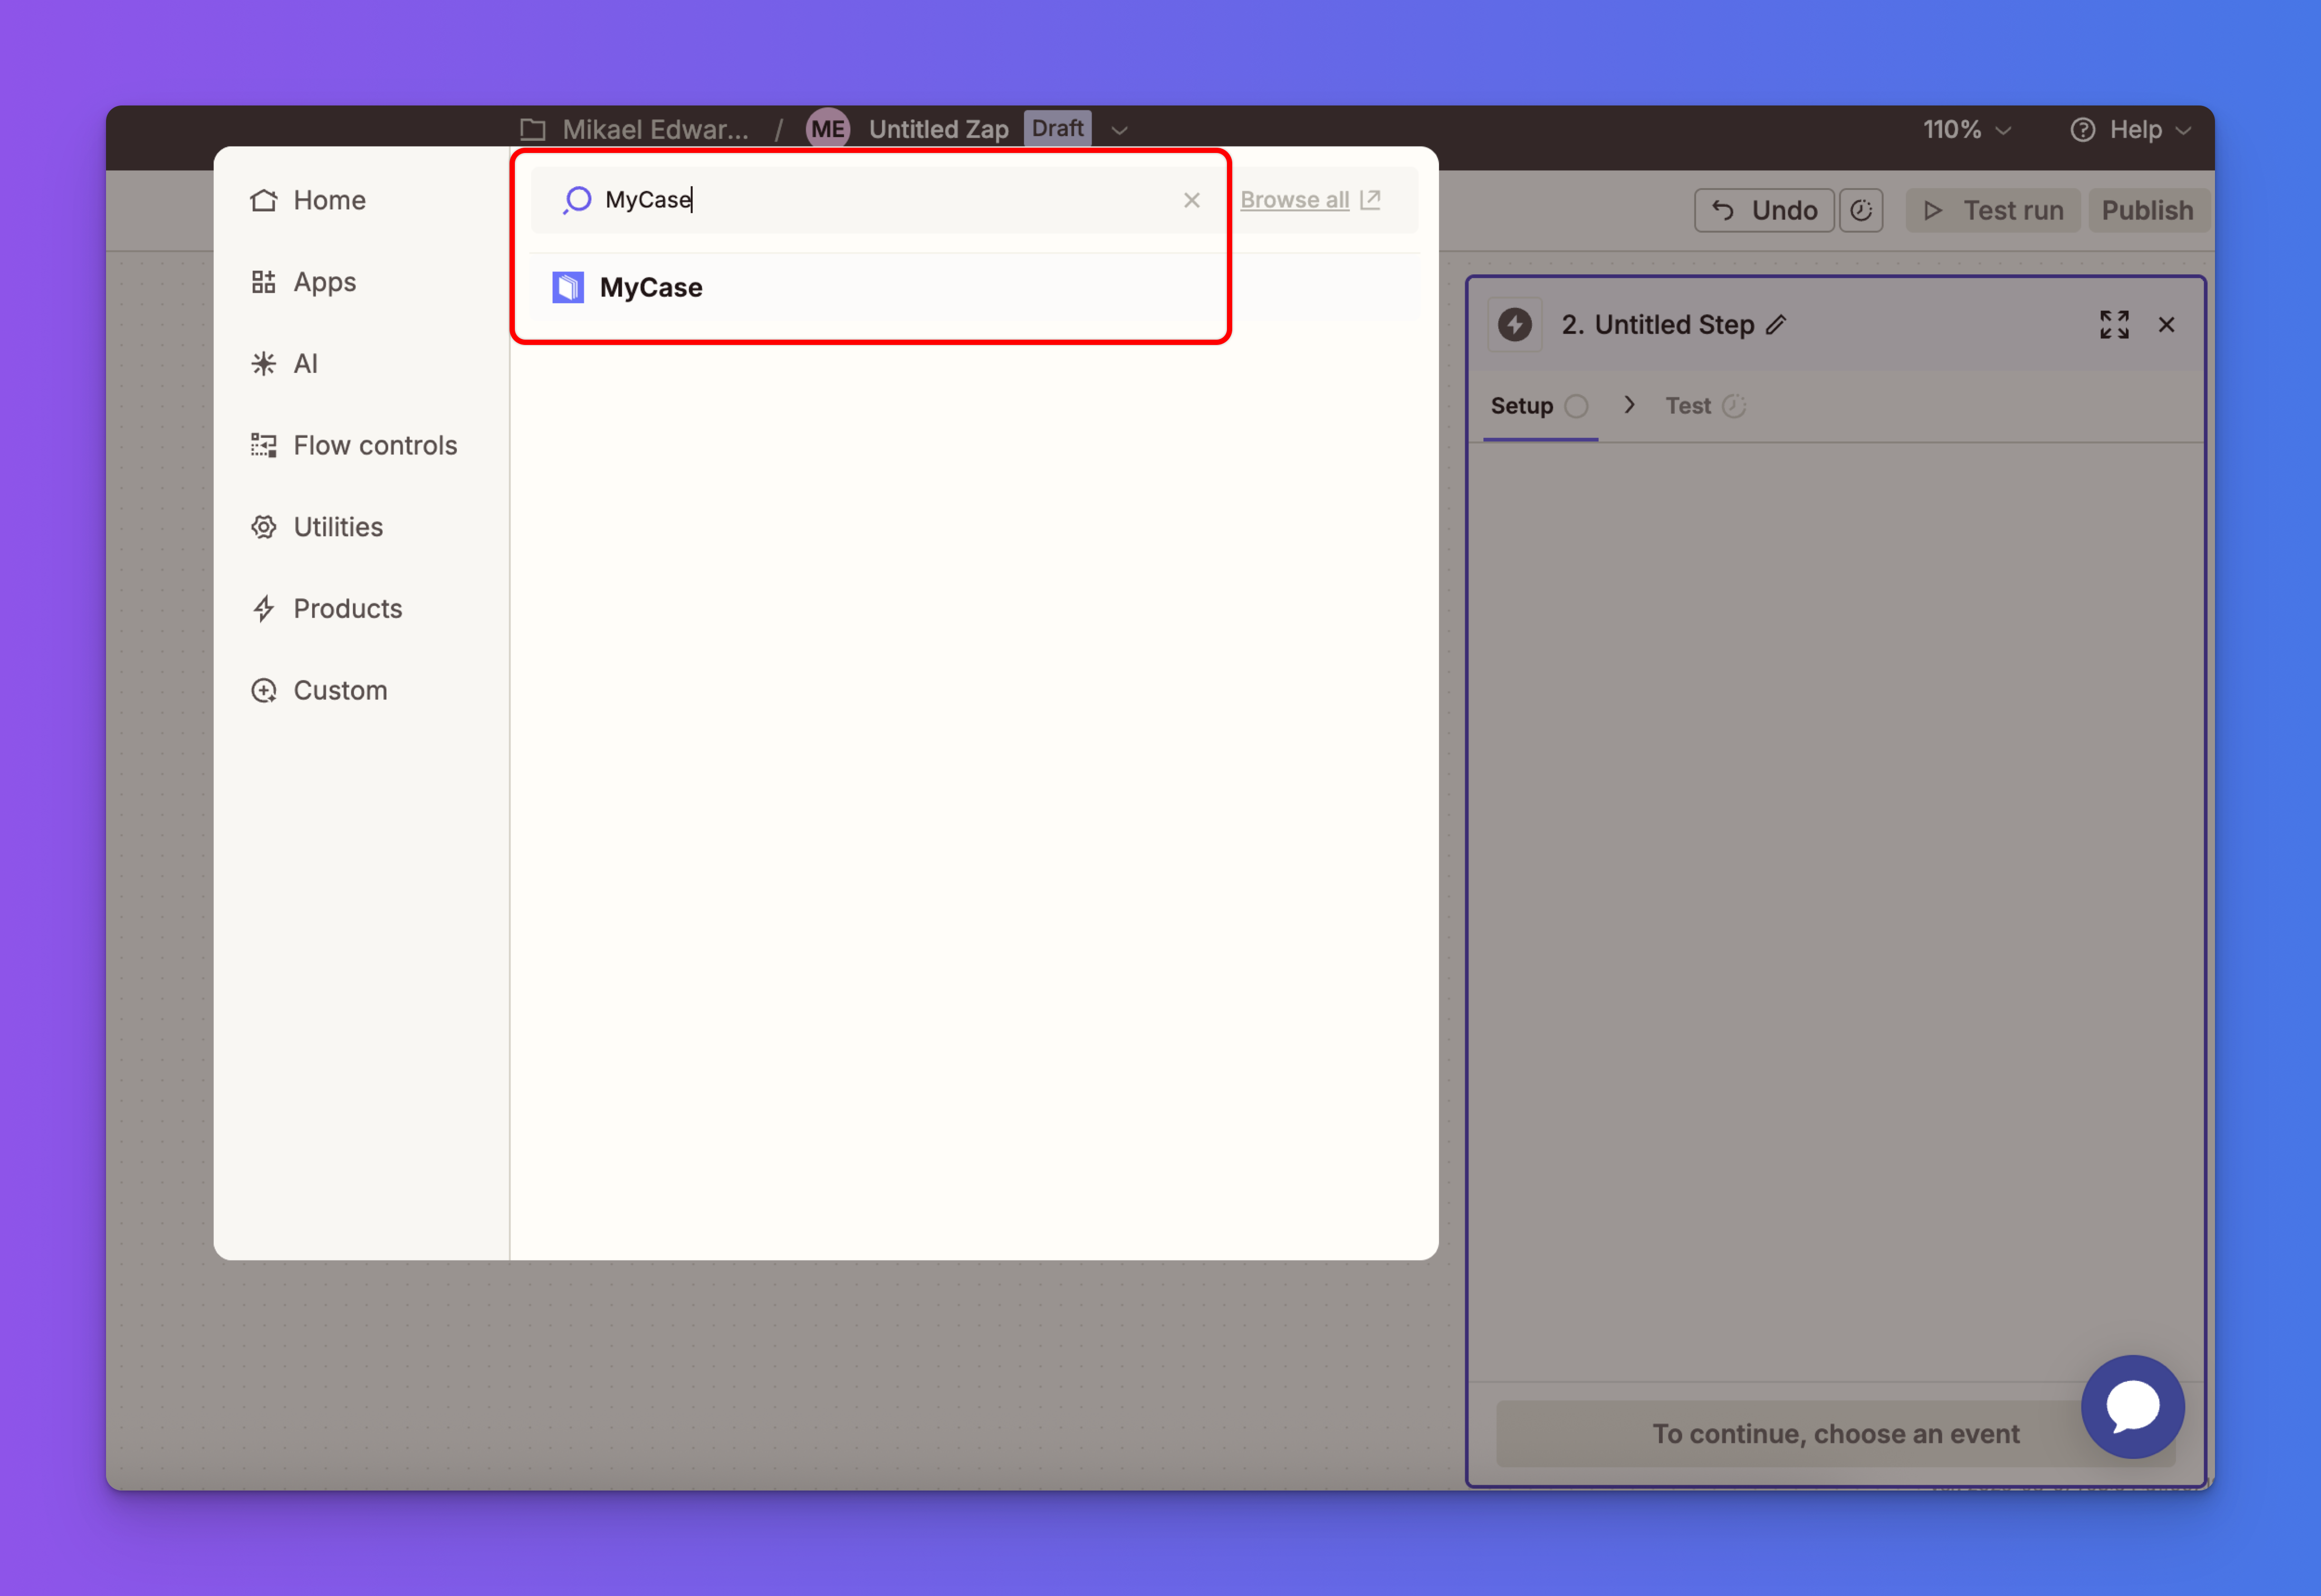
When prompted, search for MyCase again and add it as the next step in your Zap.
Under Action Event, search for and select “Find Person Contact”, then click Continue to move forward.

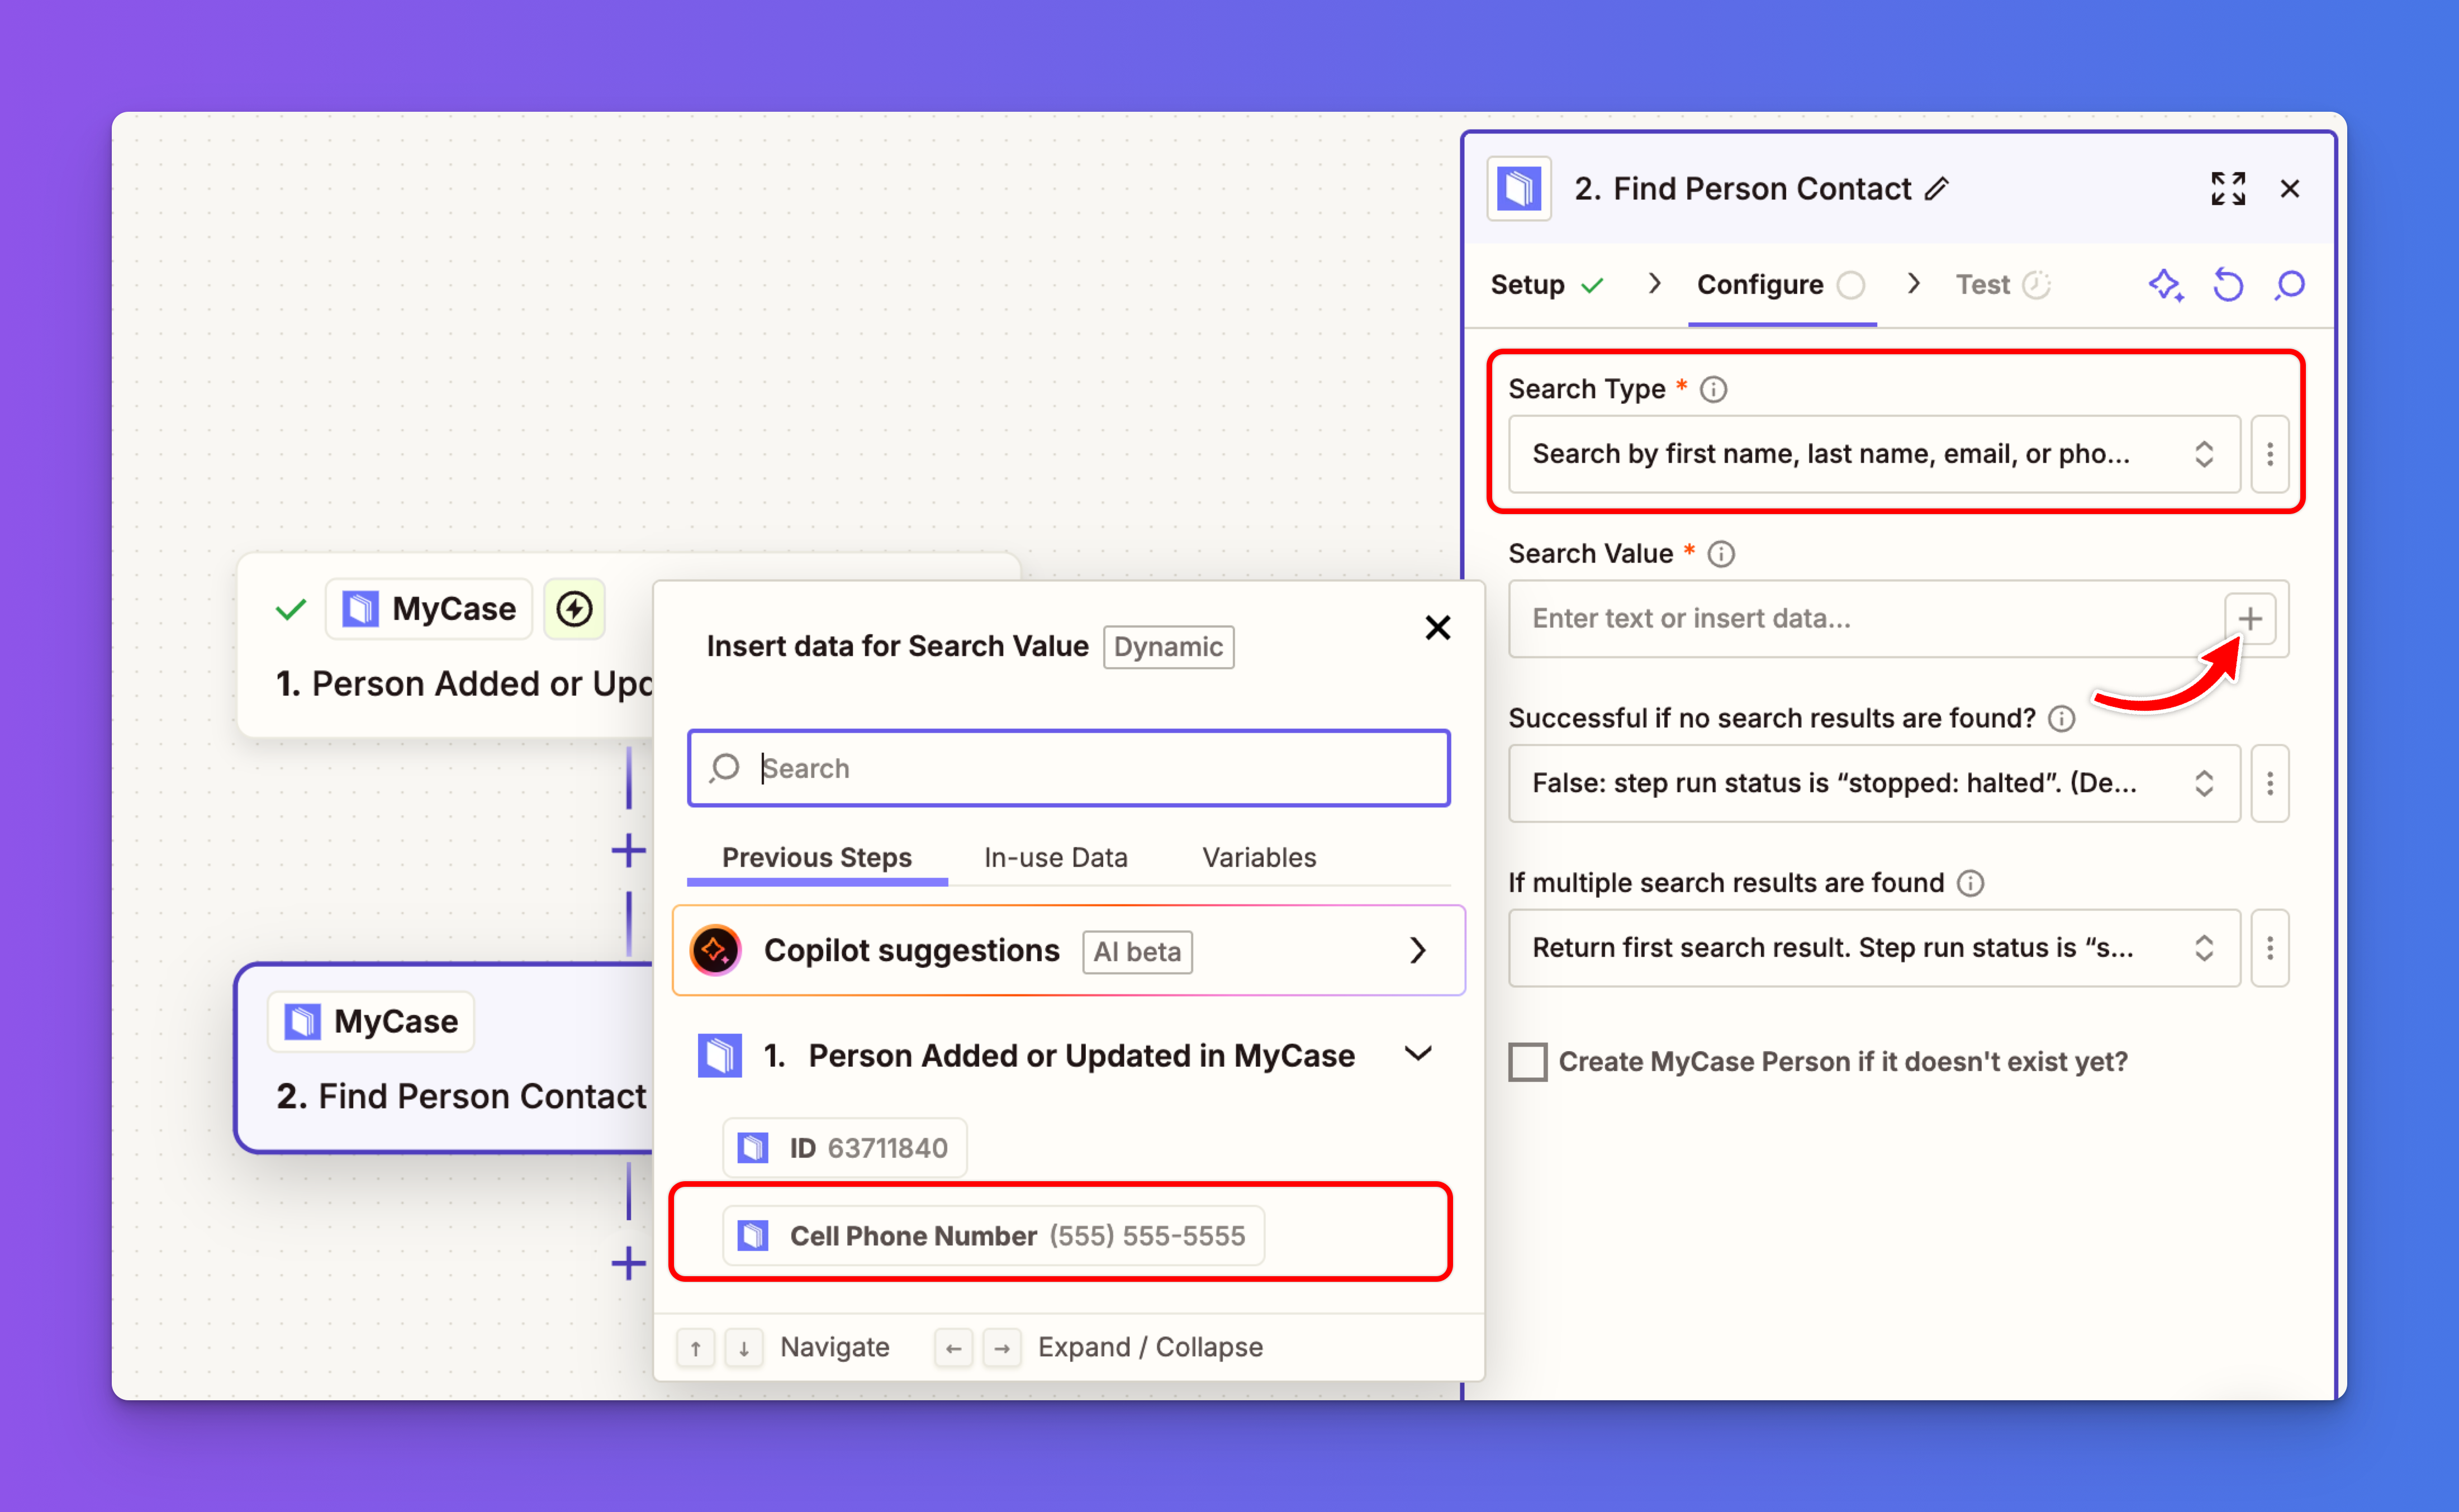
Next, under “Search Type,” keep the default option: “Search by first name, last name, email…”
Then, under “Search Value,” click the plus (+) icon and select “Cell Phone Number” from the previous step. This will be used to find the rest of the customer’s information.
With the data added, click the Continue button to proceed to the next step in your Zap.

Next, click the Test Step button to retrieve and confirm the customer’s information from MyCase.

You’ll see the customer’s information on the right side, including their First Name, Email, Phone Number, and other available details.

Now, click the plus (+) icon below the second MyCase step to add a Filter to your Zap.

Select “Filter” from the right-hand side.
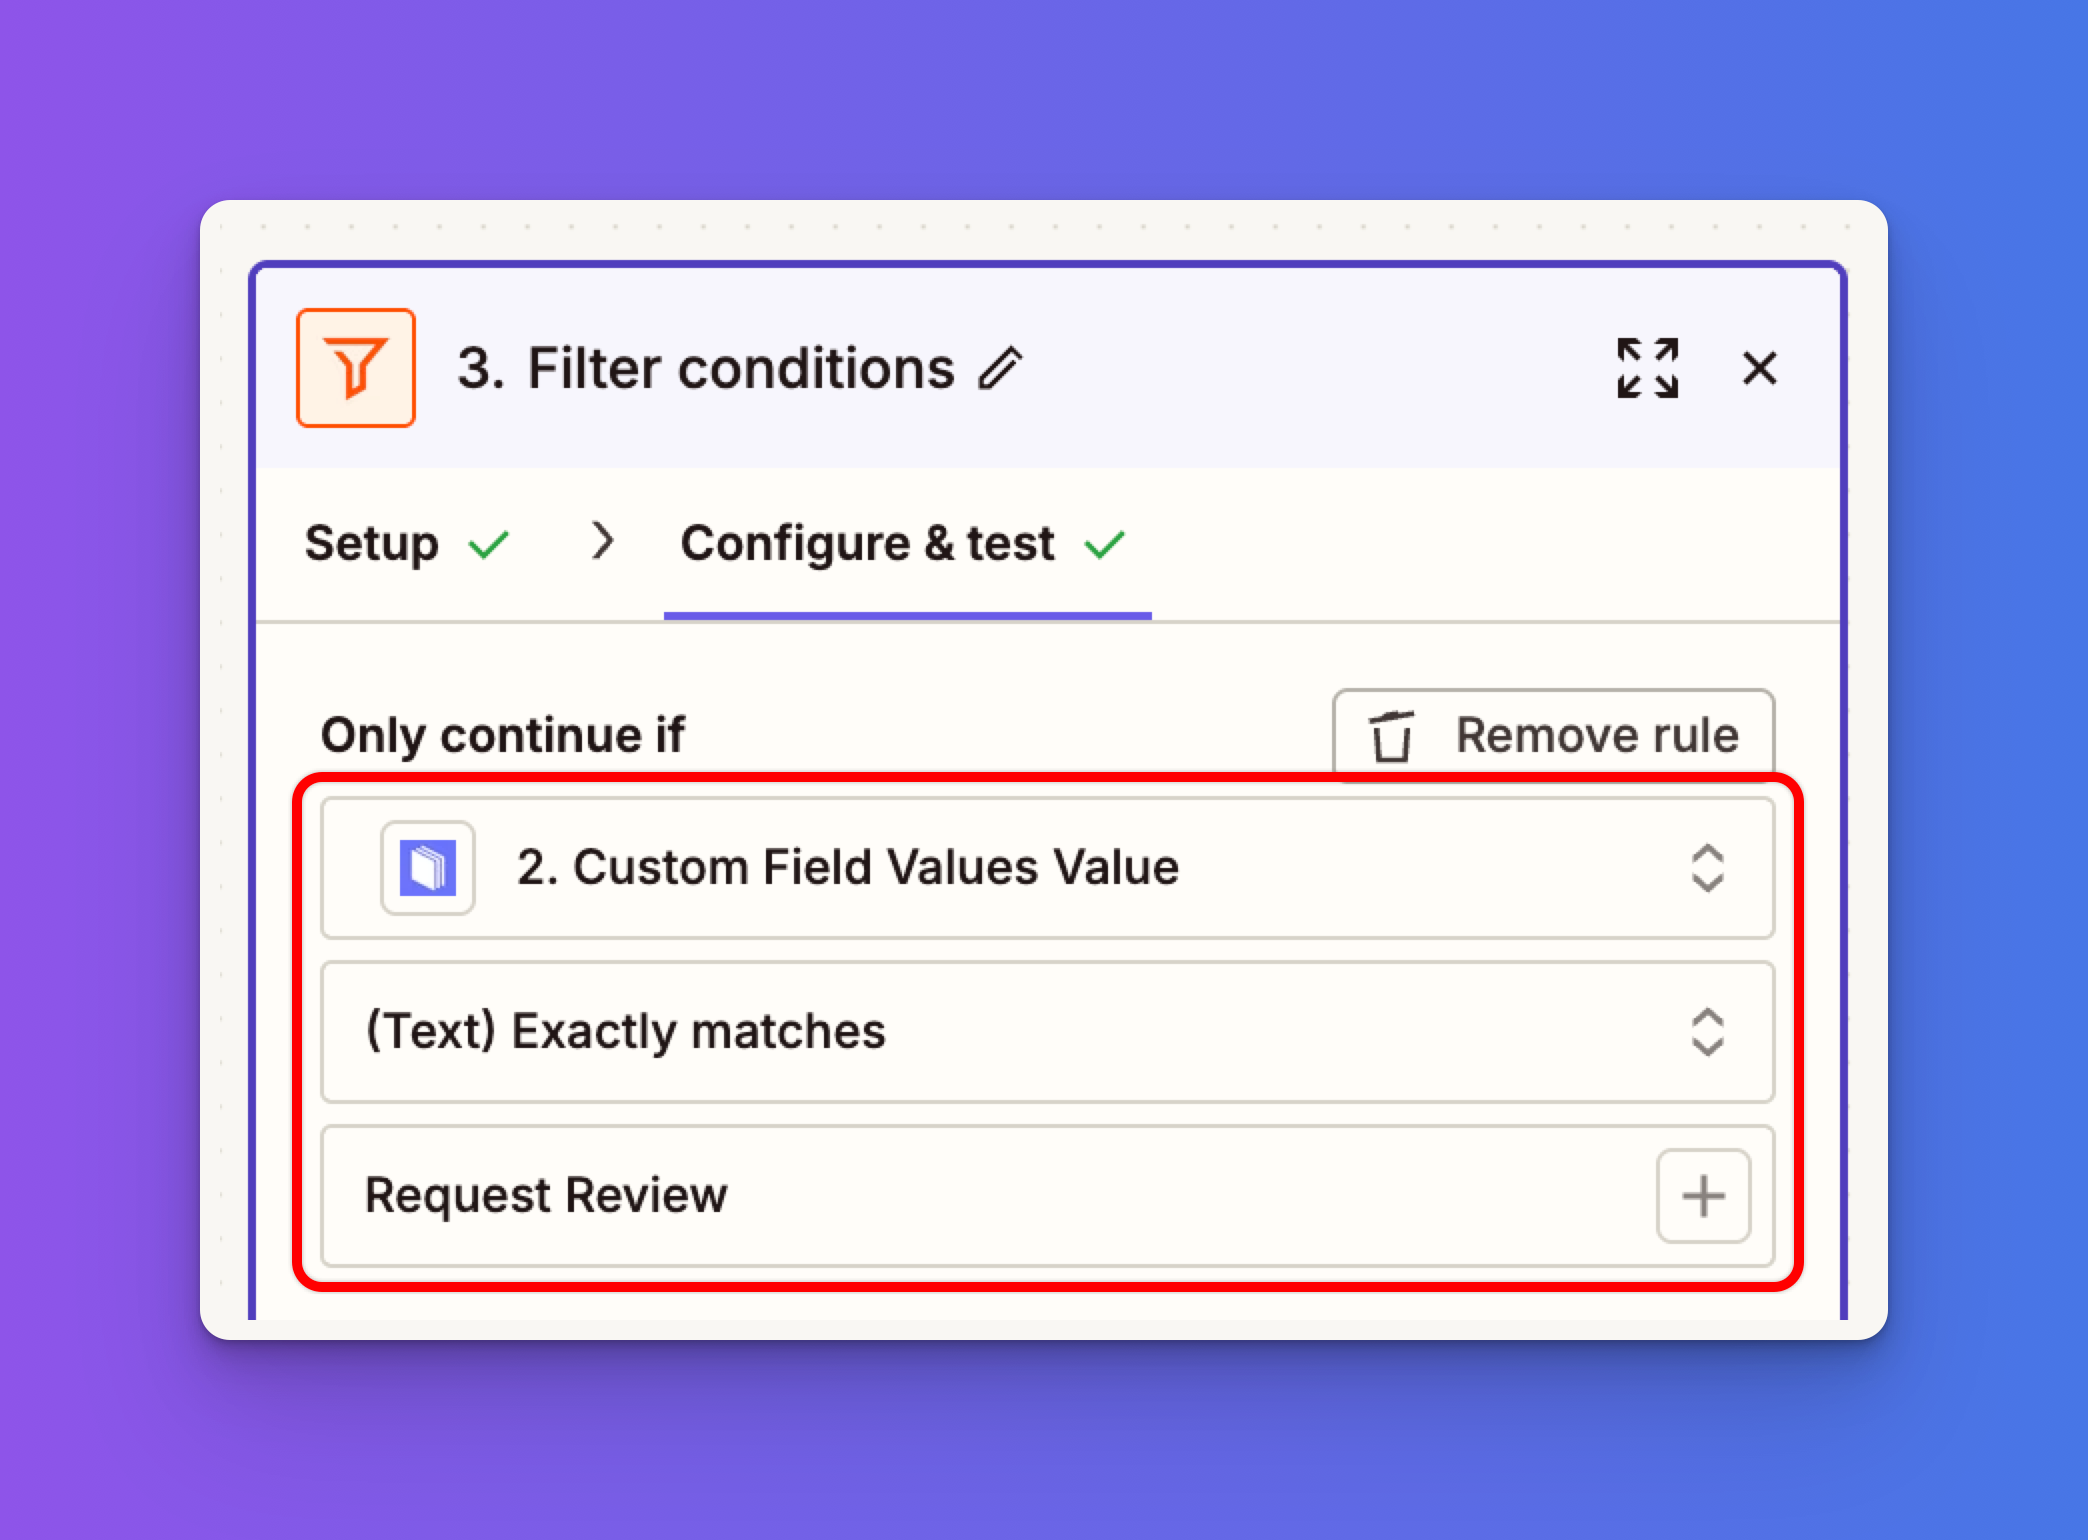
We’ll use this filter to ensure that a review request is only sent when the contact in MyCase has the trigger word “Request Review” entered in the custom field.

Now, let’s define our filter.
Under “Only continue if”, select “Custom Field Values Value” as the field.
Then choose “(Text) Exactly matches” as the condition, and in the final input box, type “Request Review”.

Here’s how the Filter conditions should be set up:
This setup ensures your Zap only continues when the contact’s custom field contains exactly “Request Review”.
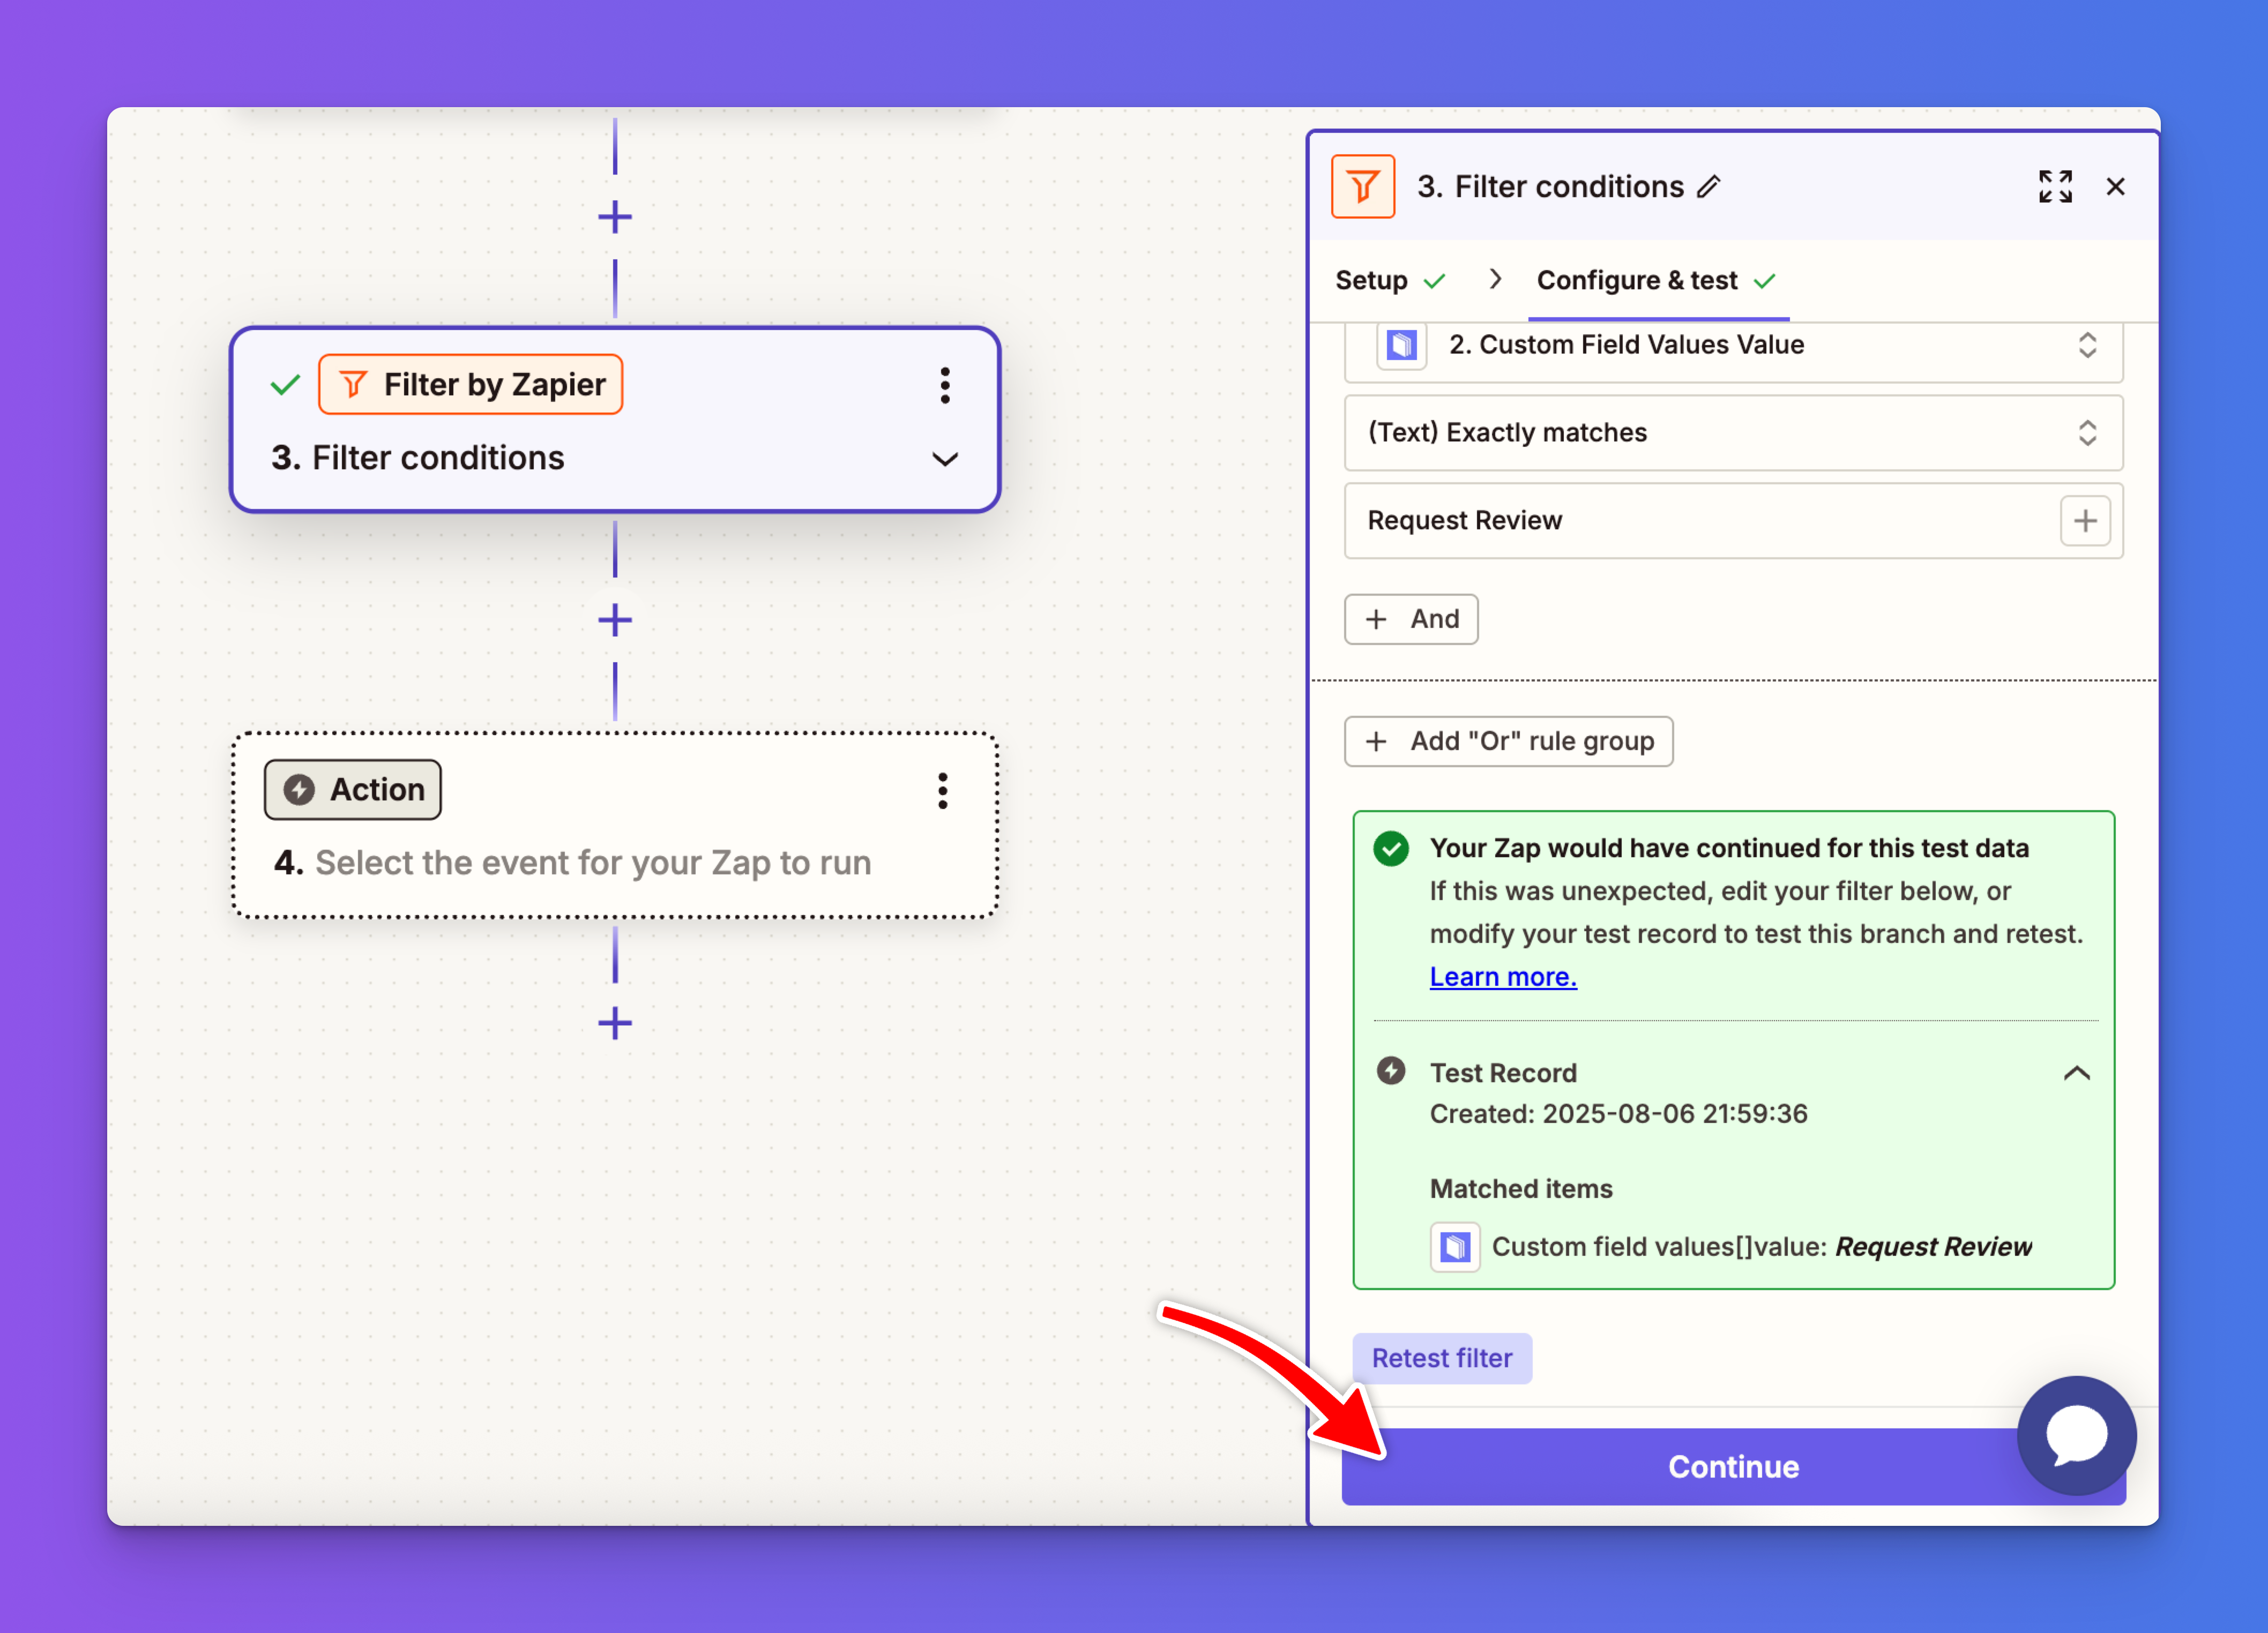
Once you’ve successfully tested the filter and it shows a match, click the Continue button to move on to the next step.
Now, we’ll use the customer information from the previous steps to send a review request through TrueReview whenever the filter conditions are met.
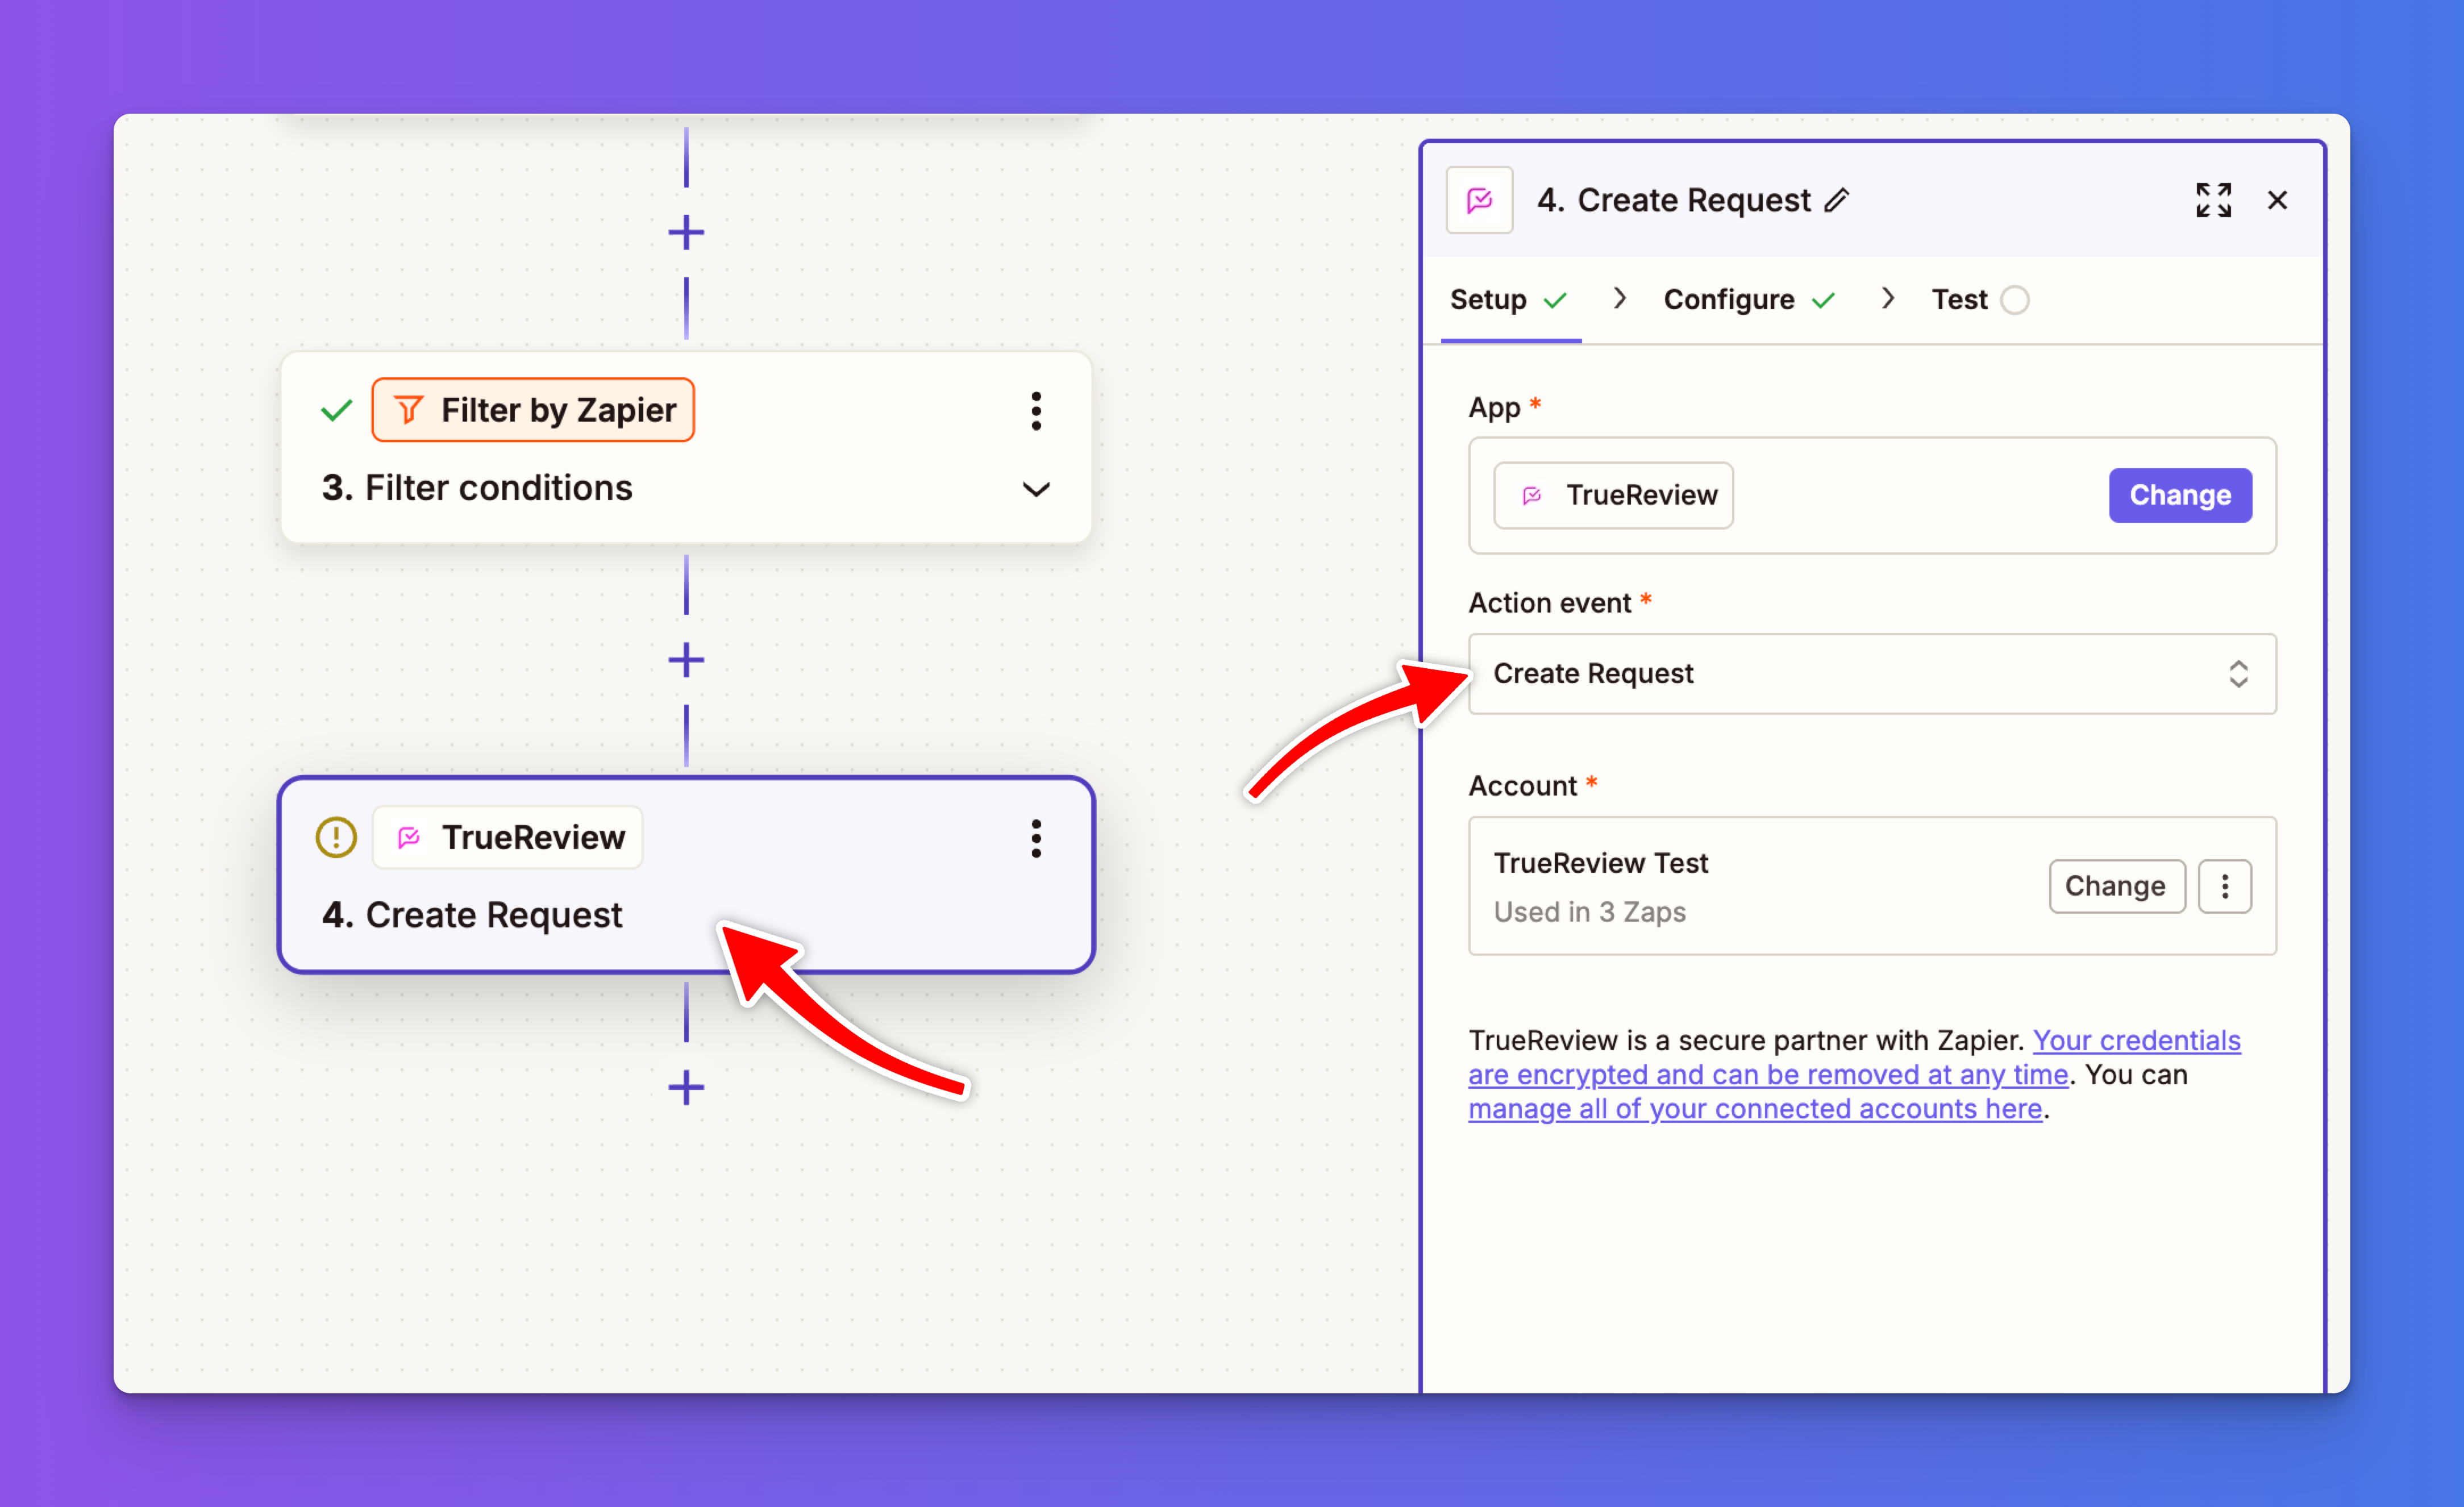
Under Action Event, choose one of the following based on your goal:
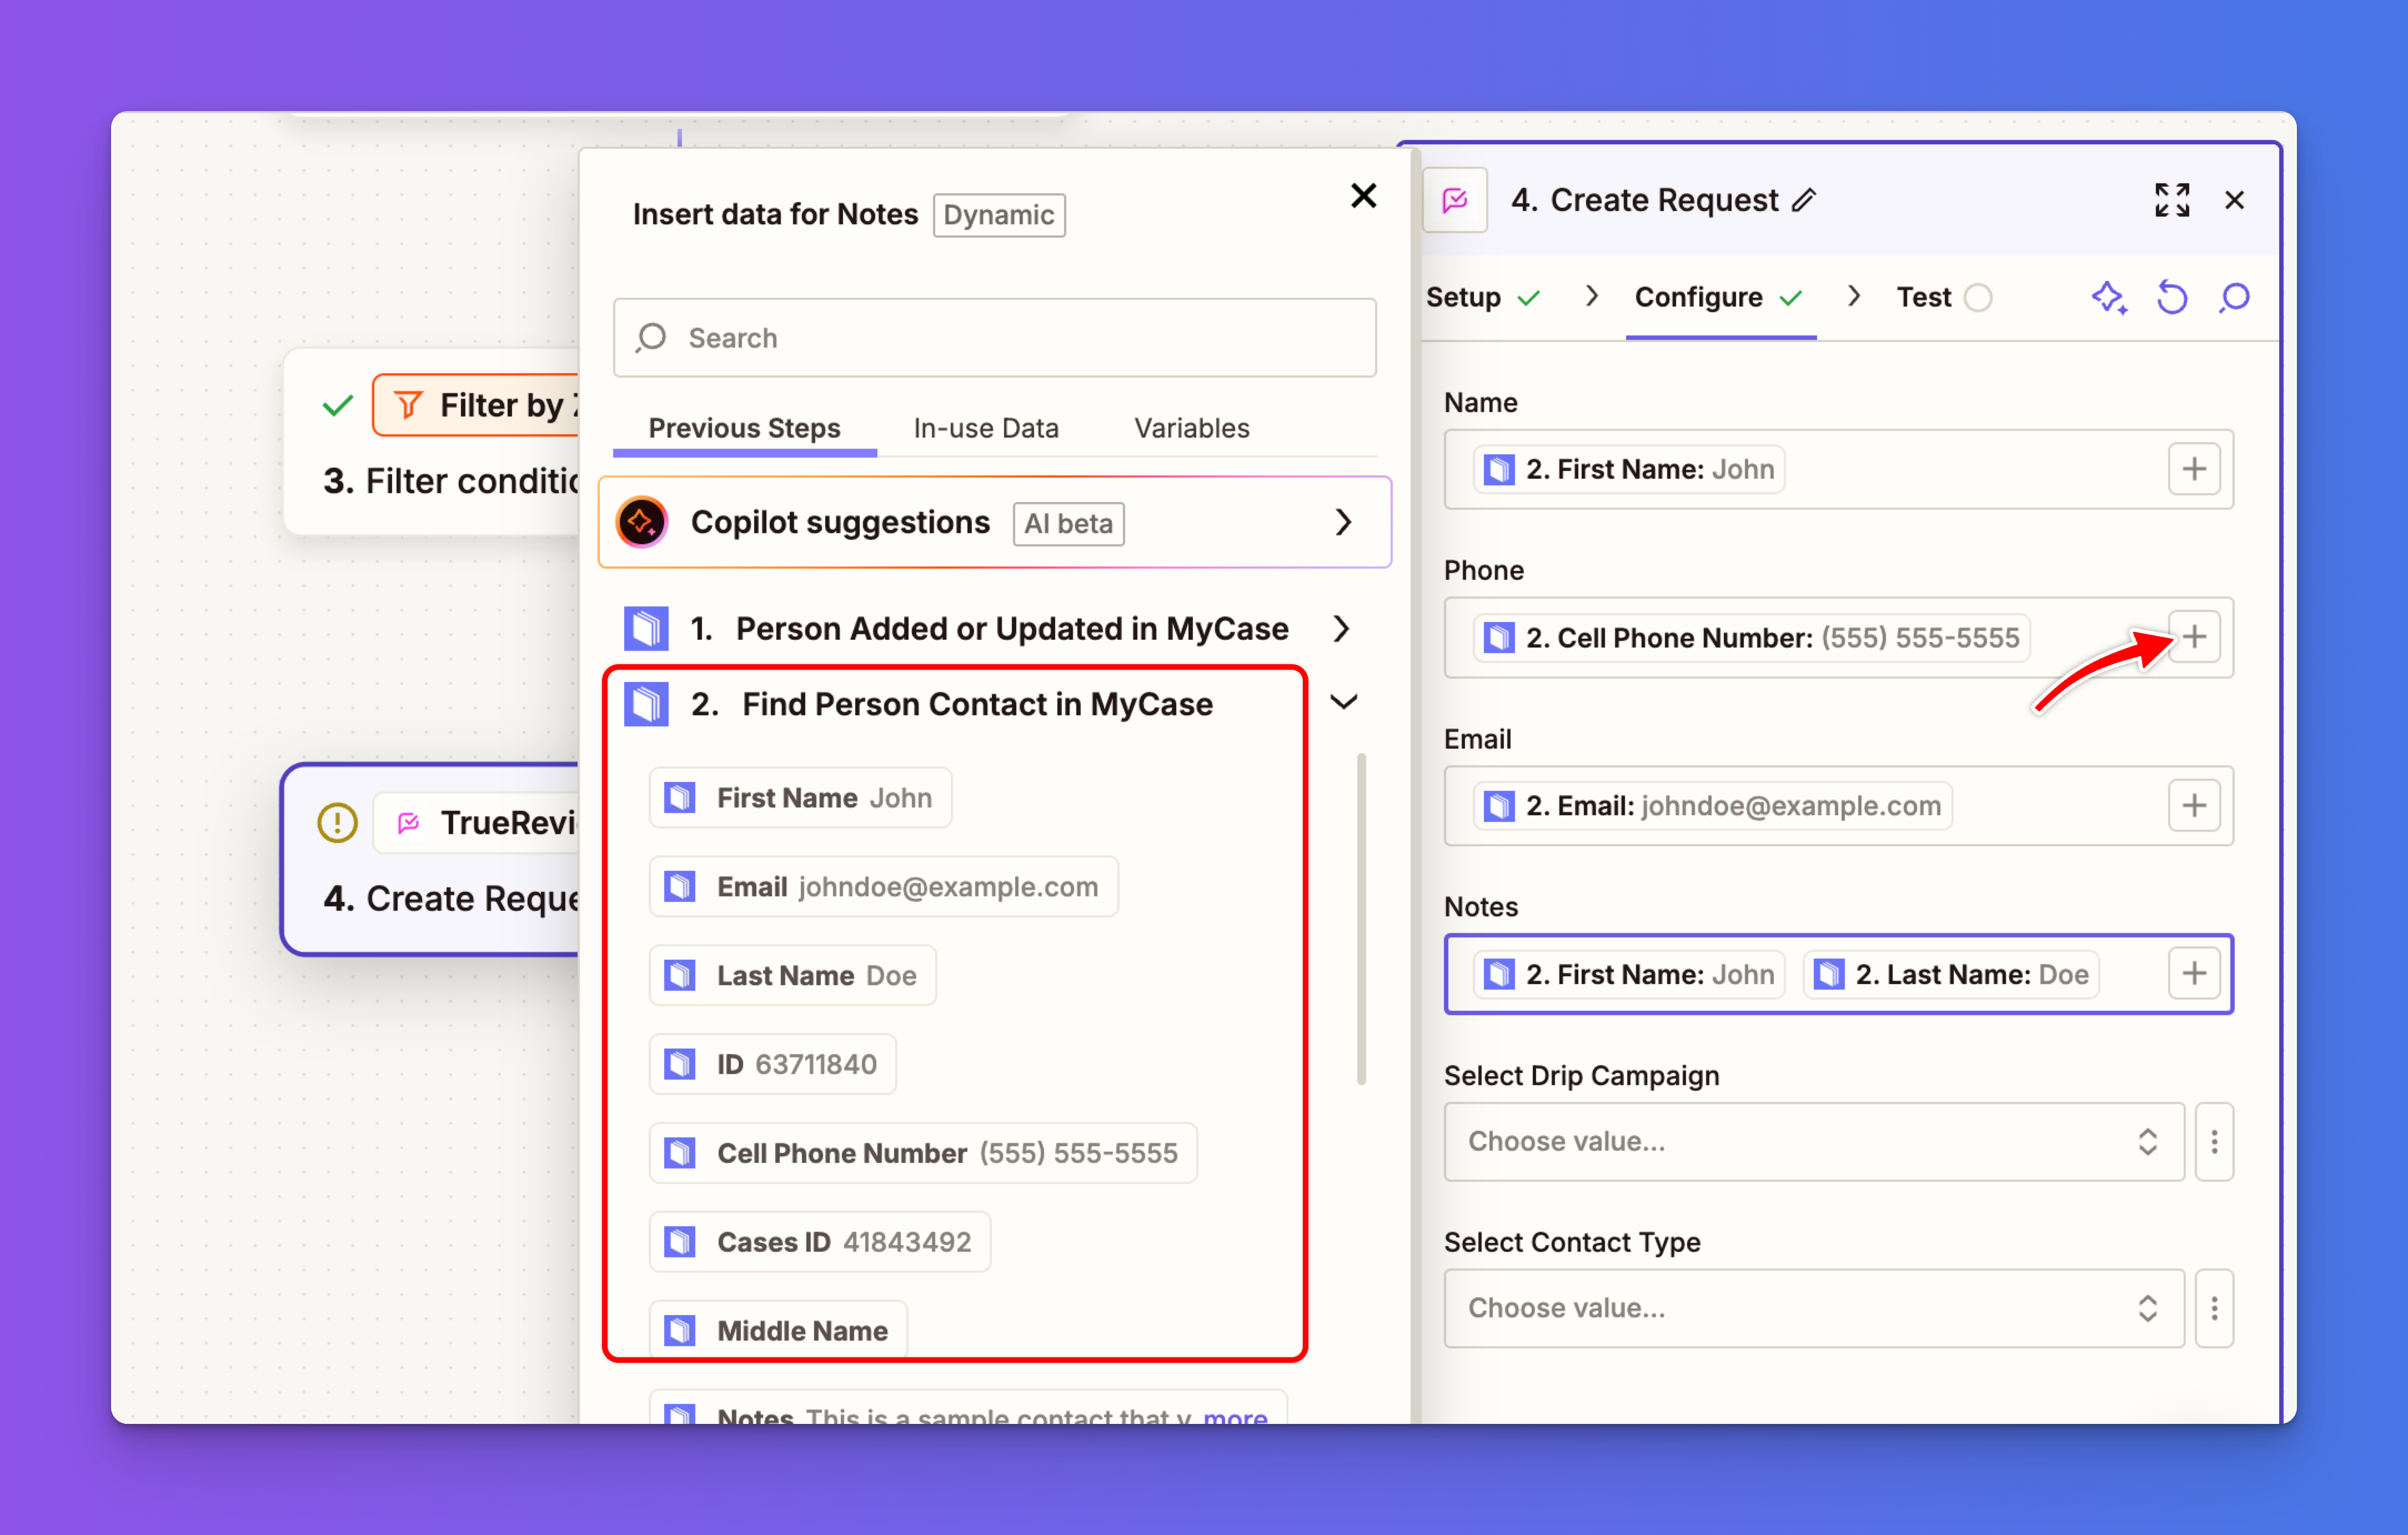
Once you've link all of the fields, like Name, Phone, Email and Notes, click continue.
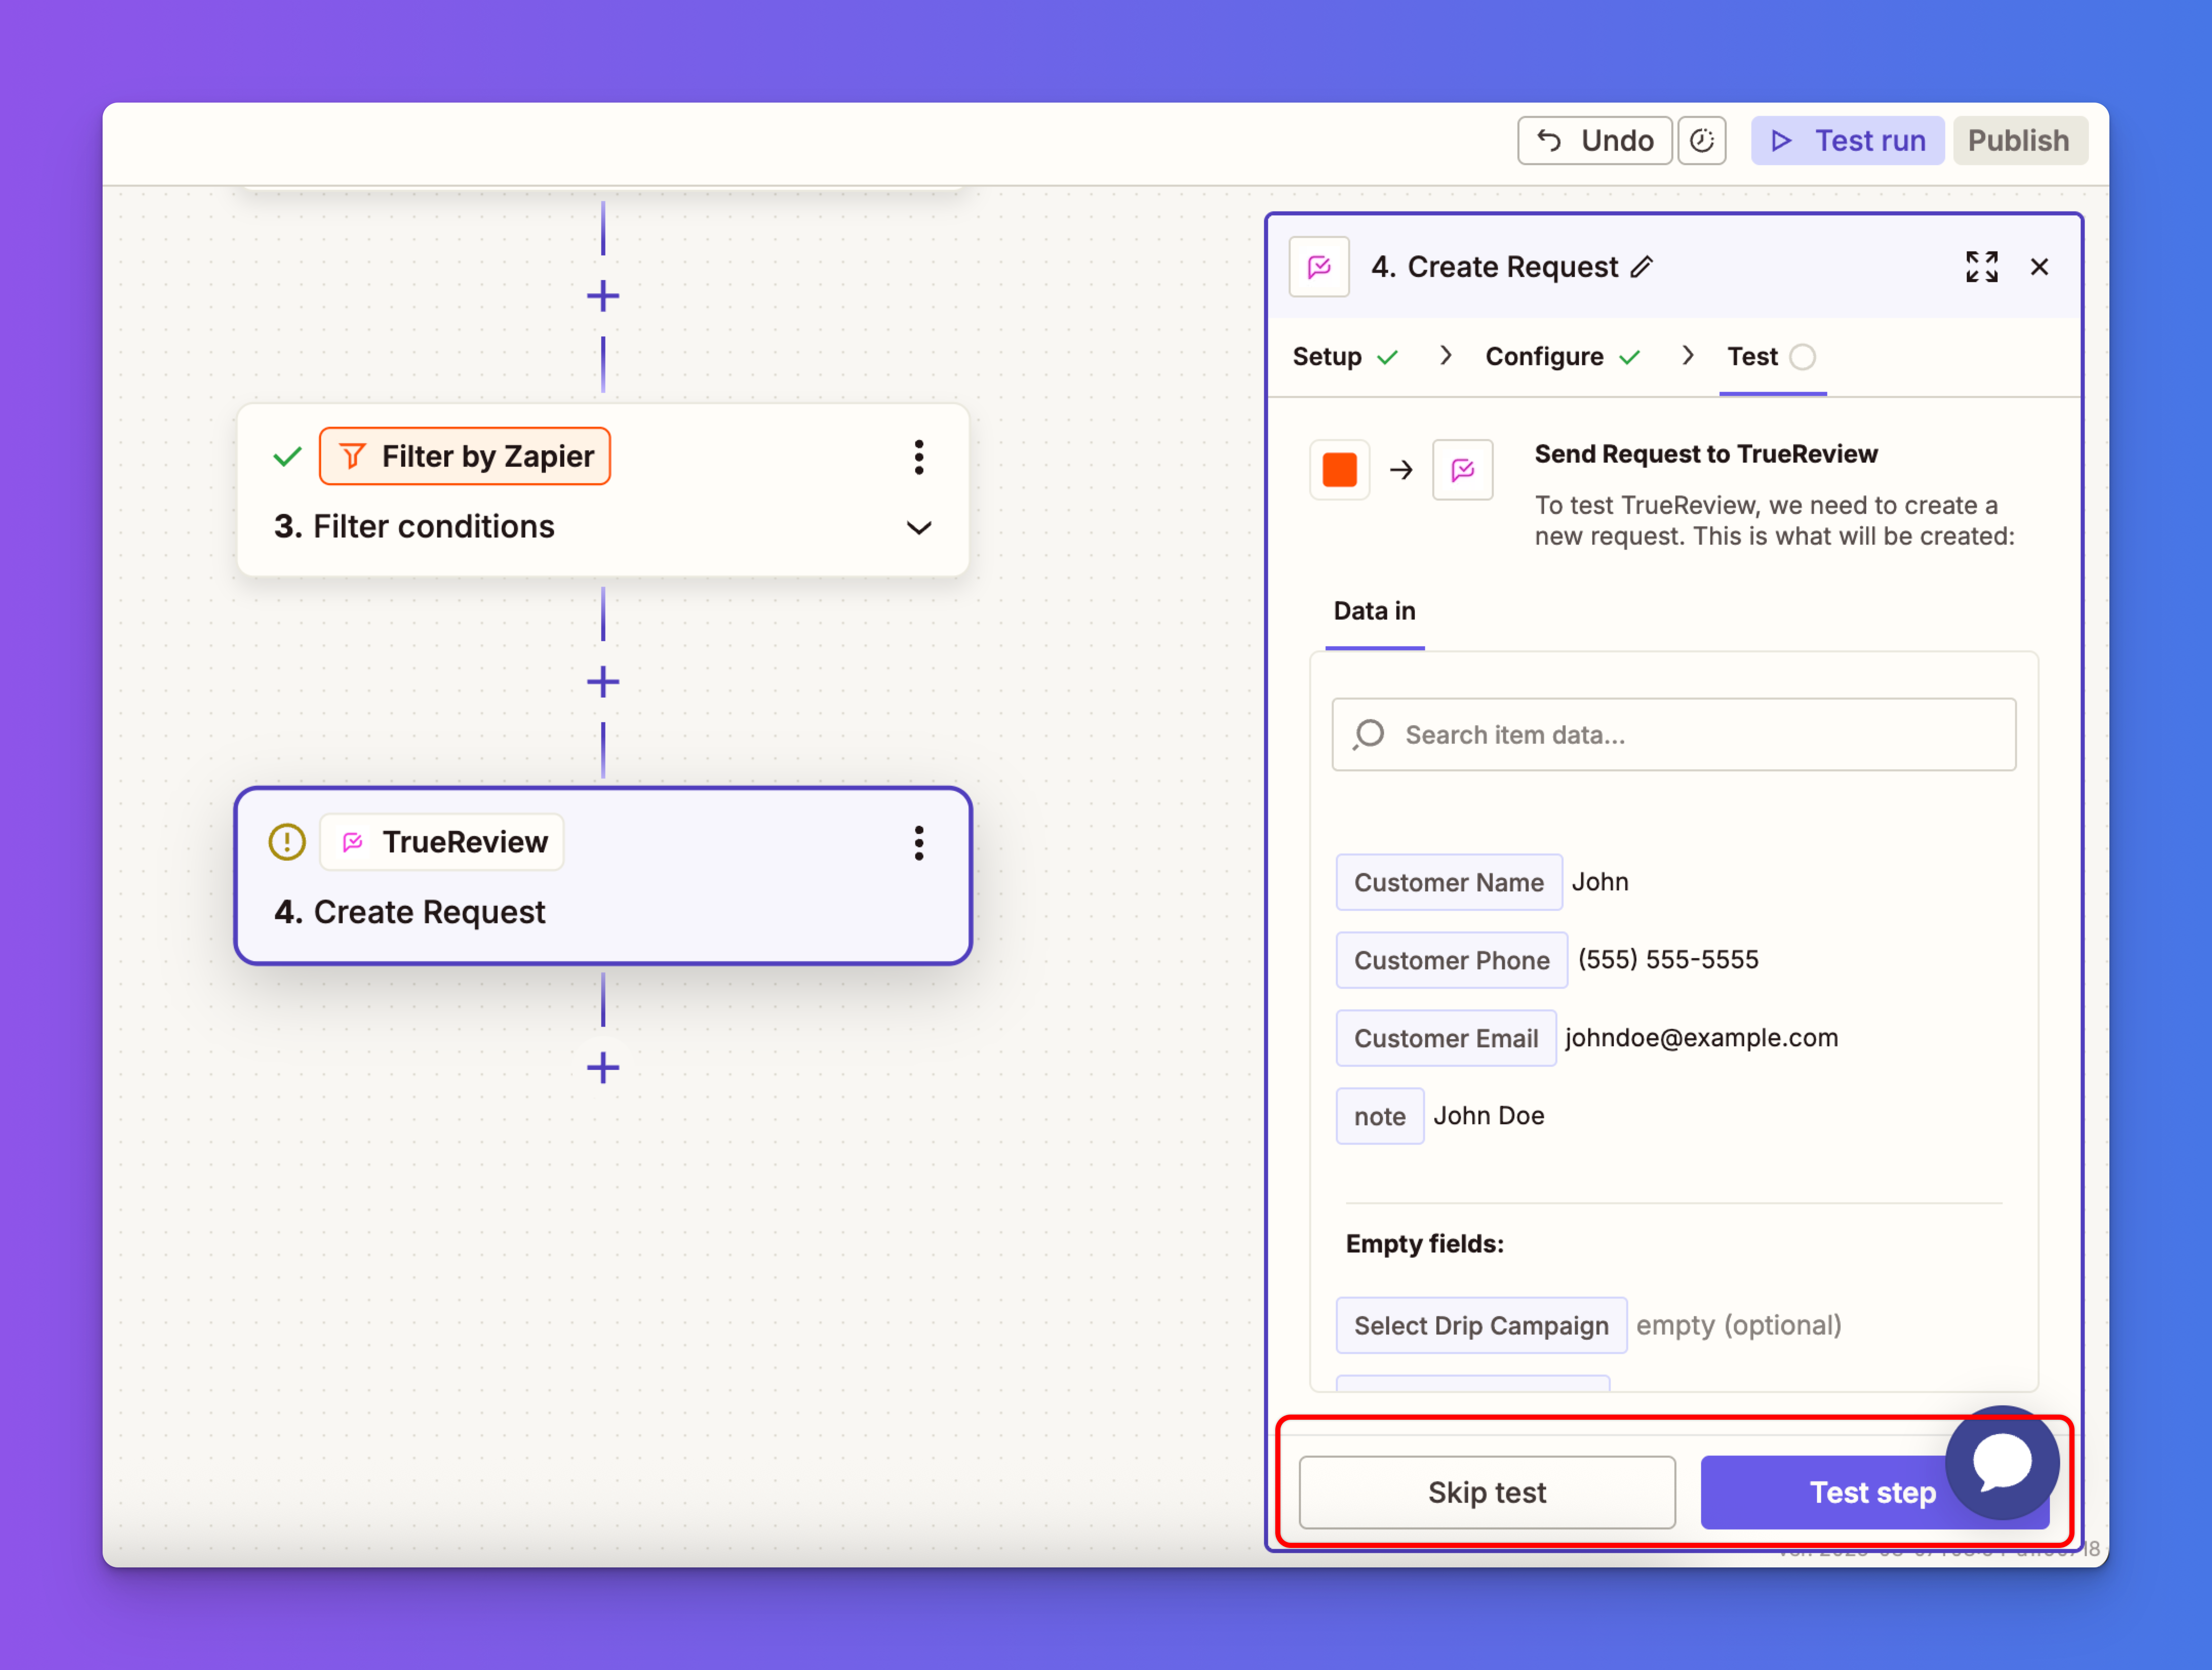
Important: If you click Test Step, a review request will be immediately sent to the customer shown in the preview.
Make sure your review request campaigns are set up and ready, or use your own contact details for testing to avoid sending a live request unintentionally.